# CLOUD PBX
# functionalities
Do you need to offer your employees the flexibility of being connected to their phone extension from multiple sites and devices to be permanently available to your customers, and does your current team have limited capabilities?
#### **Main features:**
- **Automatic Attendant (IVR)**
- **Fax Mail**
- **Voicemail**
- **Directory Dialing by Name**
- **Administration Web Panel**
- **call recording**
- **multilanguage support**
- **Email notifications**
- **Audio conference rooms**
- **Simultaneous ringing.**
- **call queue**
- **capture groups**
- **Encryption for secure calls**
- **Software-Based Modular Growth.**
- **It does not require additional licensing investments.**
# Devices
# Softphone
# Cloud Softphone
Descargar la aplicación **CLOUD SOFTPHONE**, disponible para Android e IOS.
Se puede localizar con el siguiente símbolo.
[](https://docs.cleverideas.com.mx/uploads/images/gallery/2022-11/JWDk2LAGg3fGBSeL-image-1668706646844.png)
Una vez descargada la app, se deberá seleccionar la opción **SCAN QR**.
[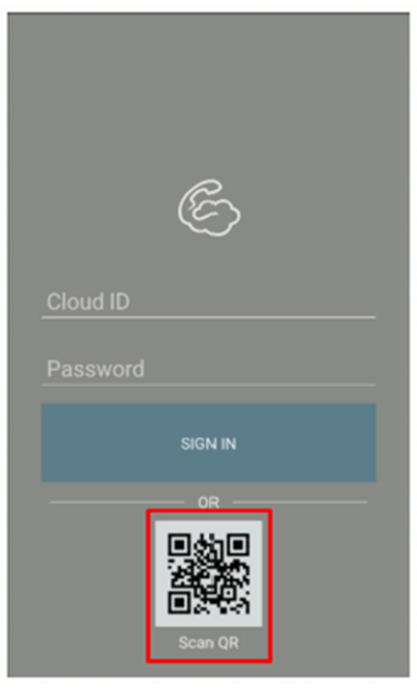](https://docs.cleverideas.com.mx/uploads/images/gallery/2022-11/nhs52mLGIYQc8Z0S-image-1668706673278.png)
Enseguida, la cámara del dispositivo se abrirá para poder escanear el código QR, y la extensión se descargará.
A continuación solo presione **ACEPTAR** o **AGREE** para términos y condiciones.
[](https://docs.cleverideas.com.mx/uploads/images/gallery/2022-11/486EJWTC6Nb44Uol-image-1668706708538.png)
Finalmente para verificar que la extensión esta correctamente registrada y habilitada, en la parte superior izquierda se mostrará un balance en **“MXN”** y la leyenda “CLEVER” en color verde.
[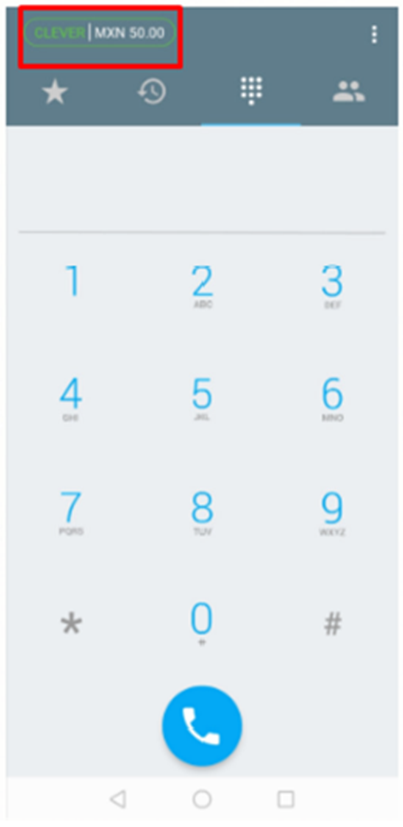](https://docs.cleverideas.com.mx/uploads/images/gallery/2022-11/SsdFdaQEOQRR1Zi4-image-1668706738459.png)
En este momento, la extensión esta lista para realizar llamadas externas, asi como comunicarse entre otras extensiones.
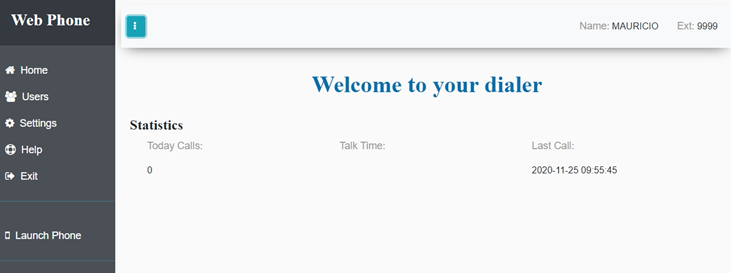
# Webphone
Webphone allows you to connect using a browser (preferably Chrome) from different devices such as: PC, laptop, tablet, smartphone
1.- Link [https://webphone.cleverideas.com.mx/index.php](https://webphone.cleverideas.com.mx/index.php)
[](https://docs.cleverideas.com.mx/uploads/images/gallery/2022-11/Bz5i7weuLX3kntyW-image-1668707392723.png)
2.- A separate window will open with the Webphone. Once signed, it is possible to make incoming or outgoing calls according to the configured profile.
[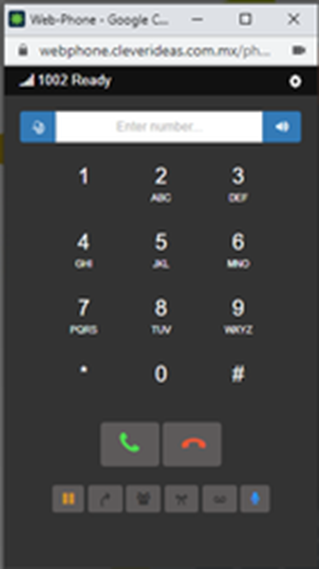](https://docs.cleverideas.com.mx/uploads/images/gallery/2022-11/yHdP8Cc9o0egfmpe-image-1668707461059.png)
3.- Call history with the option to call **“click to call”**
[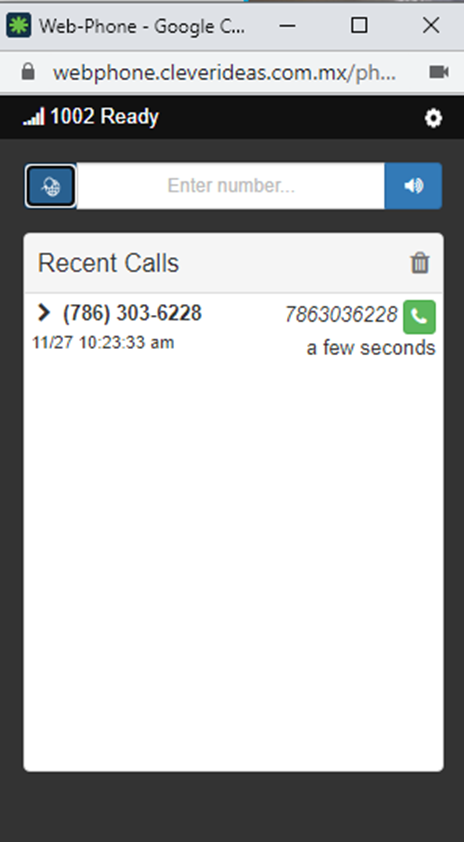](https://docs.cleverideas.com.mx/uploads/images/gallery/2022-11/S1jxLN1sYnfQjX7a-image-1668707512669.png)
4.- Configuration settings
[](https://docs.cleverideas.com.mx/uploads/images/gallery/2022-11/KCHGFVQkFre9bXEU-image-1668707540733.png)
5.- Functionality codes
[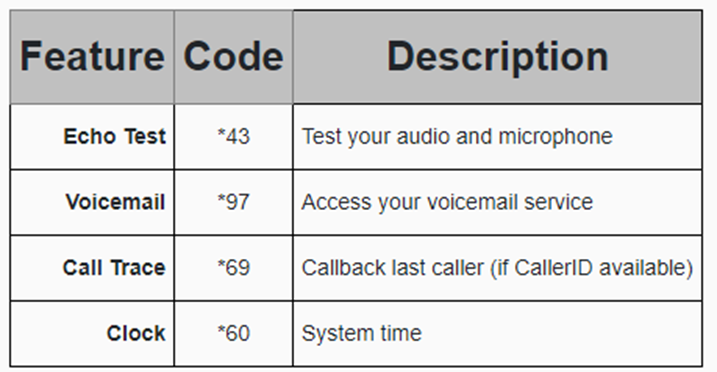](https://docs.cleverideas.com.mx/uploads/images/gallery/2022-11/4HLkWCWi3VOHMzhz-image-1668707570282.png)
# Efax
# Send eFax
#### **SEND FAX MANUAL**
**LOGIN TO PANEL**.
| Login in the link https: | https://mybilling.cleverideas.com.mx:8445/ with the following credentials. |
| user: | fax18887294929 |
| pass: | cashlane123\* |
1. Click on the tab “IP CENTREX” and select the option “SEND FAX”.
2. After that, you will be able select PDF file to send as FAX.
3. Then, you need to set the phone number, as 1+10 digits. Exaple: 18134213921. Make sure doesn ́t leave blank spaces typing the phone number.
4. Once you have selected PDF file and set phone complette phone number, just press button
UPLOAD.
You will see a pop up window** “FAX SEND”**
5. After that, in few minutes, you will recieve an email of your FAX status failed or success.
In case you recieve a status message as FAILED, please, verify the phone number is active or
enabled to recieve FAX or check blank spaces on it.
# Q&A