# Training Supervisor
uContact Supervisor is responsible for all system management, manages and monitors campaigns and autodialers; permissions, users, providers can be created and workflows are configured along with forms and reports.
# Supervisor Interface
# Canned Responses Creation and Modification
#### How to manage canned responses:
**Prerequisites:**
- **Permissions:** Supervisor access is required to create or manage Canned Responses.
- **Availability:** This feature is available for all campaign types **except** Telephony and Email.
#### Creating a New Canned Response
1. Click on the **Campaigns** button and select your desired campaign type (e.g., Webchat, SMS).[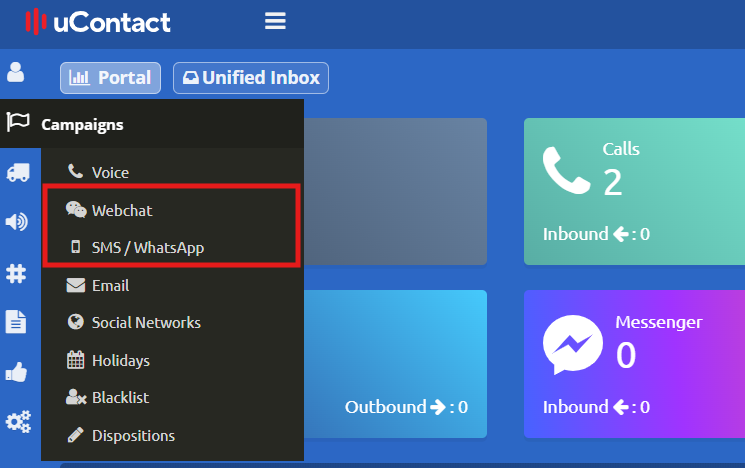](https://docs.cleverideas.ai/uploads/images/gallery/2026-04/e2VuaLcrjGVnenAO-1.png)
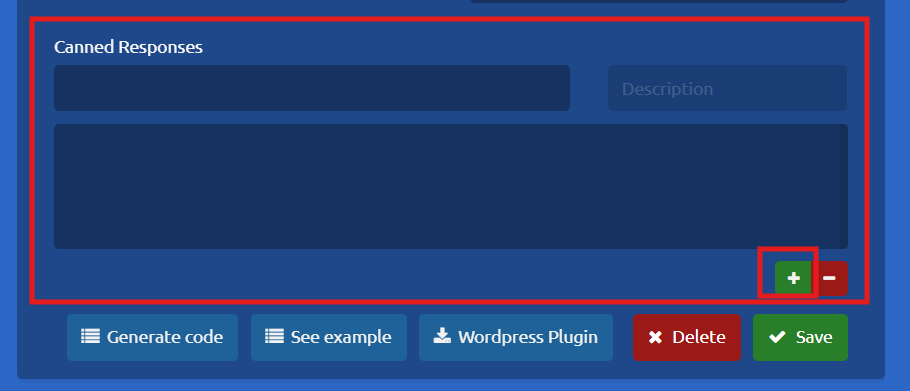
2. Choose the specific campaign you want to configure. Scroll down to the bottom of the settings page to locate the **Canned Responses** section, then click the **+** (Plus) icon to add a new response.
[](https://docs.cleverideas.ai/uploads/images/gallery/2026-04/9D766VX78PeJyDMu-2.png)
3\. A dialog box will appear. Enter a **Title** and the **Text** for your response, then click **Add**.
[](https://docs.cleverideas.ai/uploads/images/gallery/2026-04/NKqf2IHYApwlI8jr-3.png)
4\. Once added, click **Save** on the main page to apply the new Canned Response to your campaign.
[](https://docs.cleverideas.ai/uploads/images/gallery/2026-04/9YWsvdfONz4rGL9A-4.png)
##### Deleting a Canned Response:
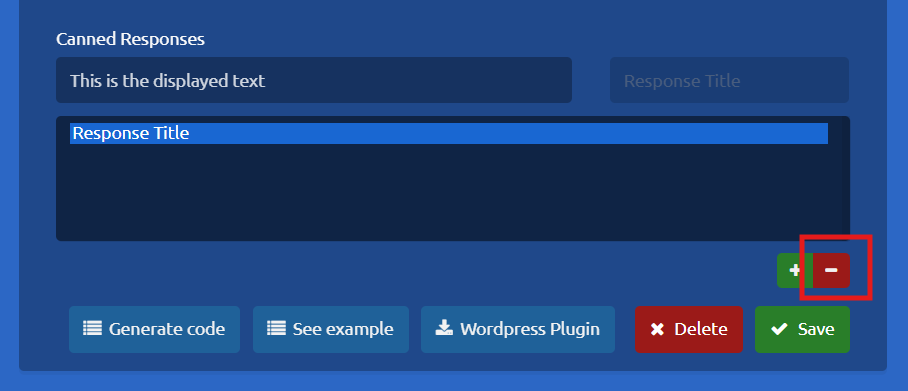
1\. Select your campaign and scroll down to the **Canned Responses** section.
2\. Locate the response you wish to remove and click the **-** (Minus) icon next to it
[](https://docs.cleverideas.ai/uploads/images/gallery/2026-04/LfIEAsZmSHYNvHPs-5.png)
#### Editing a Canned Response
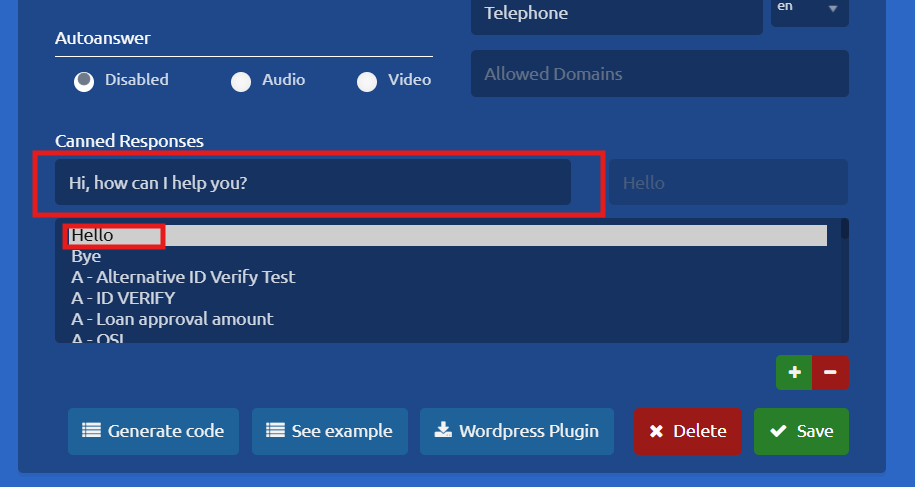
1. Select your campaign and scroll down to the **Canned Responses** section.
2. Click on the Canned Response you wish to modify, then click directly on its text area.
[](https://docs.cleverideas.ai/uploads/images/gallery/2026-04/AfhOj1ZgkuONM7B8-6.png)
3. A dialog box will open where you can edit both the title and the text. Once you have made your changes, click **add.**
[](https://docs.cleverideas.ai/uploads/images/gallery/2026-04/Gd4amsH2bj5RLoa4-3.png)
4\. Finally, click **Save** on the main campaign settings page to ensure your updates are applied.
[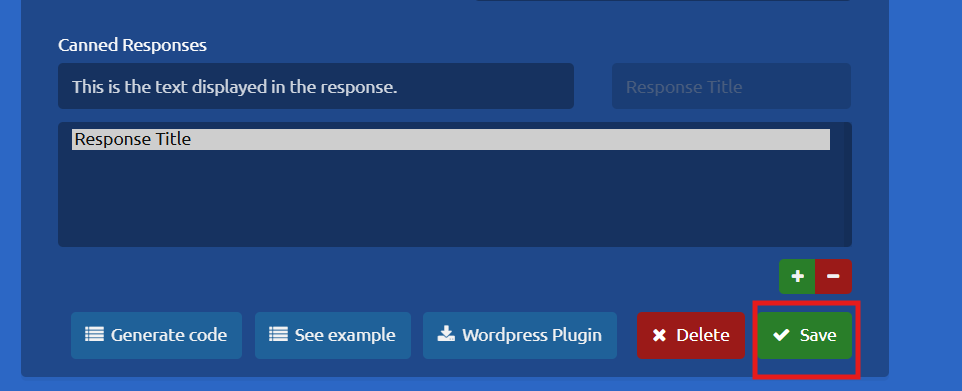](https://docs.cleverideas.ai/uploads/images/gallery/2026-04/BbyMd6pjMYAcjGBw-4.png)
# How to Create a New Agent
Follow these steps to create and configure a new agent in the system:
1\. Go to the main navigation bar, select the **Users** option, and then click on **Agents**.
[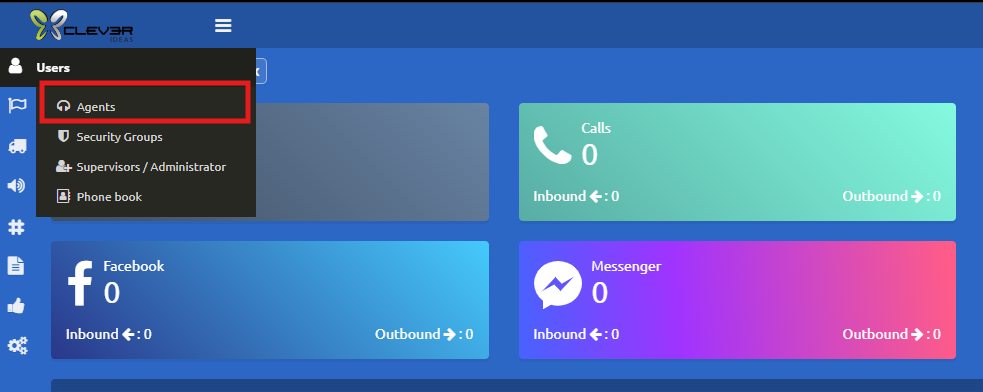](https://docs.cleverideas.ai/uploads/images/gallery/2026-04/NLNo8f0zO0WLhseM-1.png)
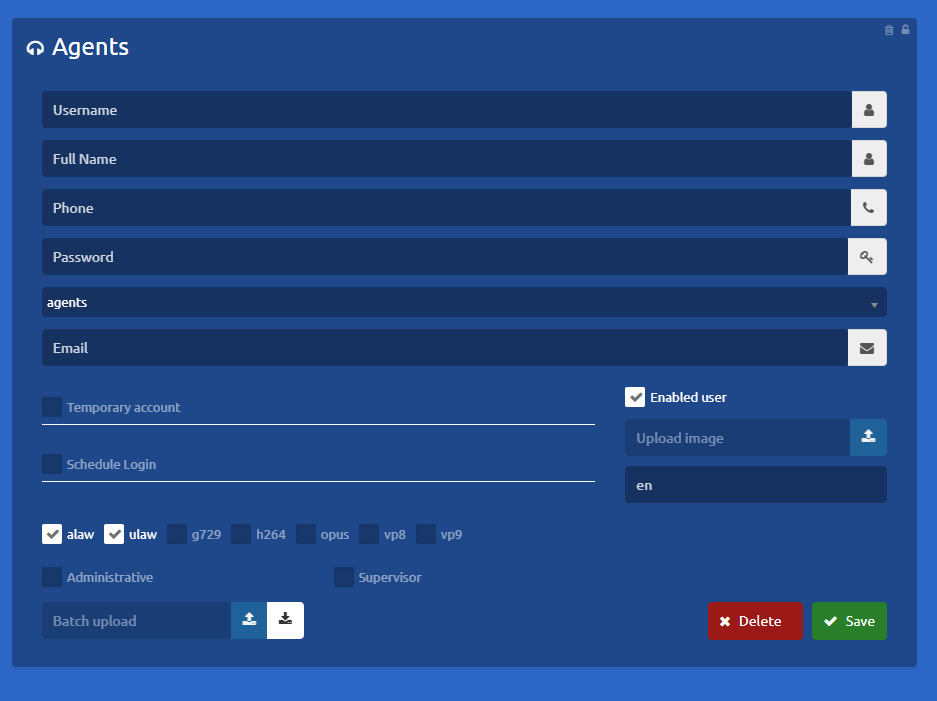
2\. Fill in the Agent Information the Agents section will open. Complete the form by providing the requested details for the new agent:
[](https://docs.cleverideas.ai/uploads/images/gallery/2026-04/xPx0SkdLIxHKXOLo-2.png)
- **User Name:** Enter the username the agent will use to log into the system
- **Full Name:** Enter the agent's complete first and last name.
- **Phone:** Enter the agent's assigned extension. *(Note: Please verify that this extension is not already in use).*
- **Password:** Assign a temporary generic password (*e.g.123456)* The system will automatically prompt the user to change it upon their first login.
- **Email:** Enter the agent's email address (if applicable).
- **Temporary account**: Grants temporary access to uContact
- **Encodes check box:** Codecs used by the provider
- **Language:** Select the user's preferred language for the system interface
- **Supervisor:** Checking this option will grant the user full supervisor privileges within the system (Supervisor menu and spymode)
- **Administrative:** User with access to the supervisor menus and privileges but without a phone and spymode
# How to Add Users to Campaigns
**Important Consideration: To fully activate a user, the agent must be added to a voice campaign. This step is mandatory for account activation, even if the selected campaign is currently inactive.**
**1. Access the Campaigns Menu** Go to the side menu, select the **Campaigns** section, and choose the appropriate campaign type.
[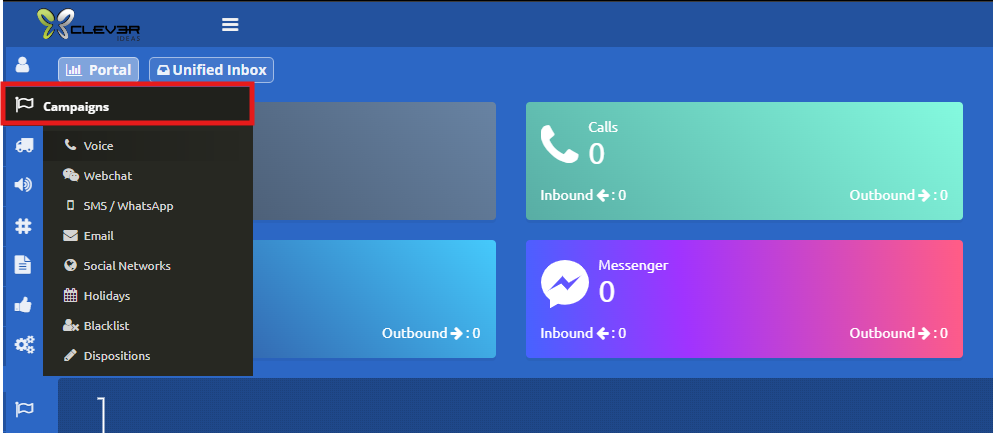](https://docs.cleverideas.ai/uploads/images/gallery/2026-04/3GyODiBIgBjiCkSE-1.png)
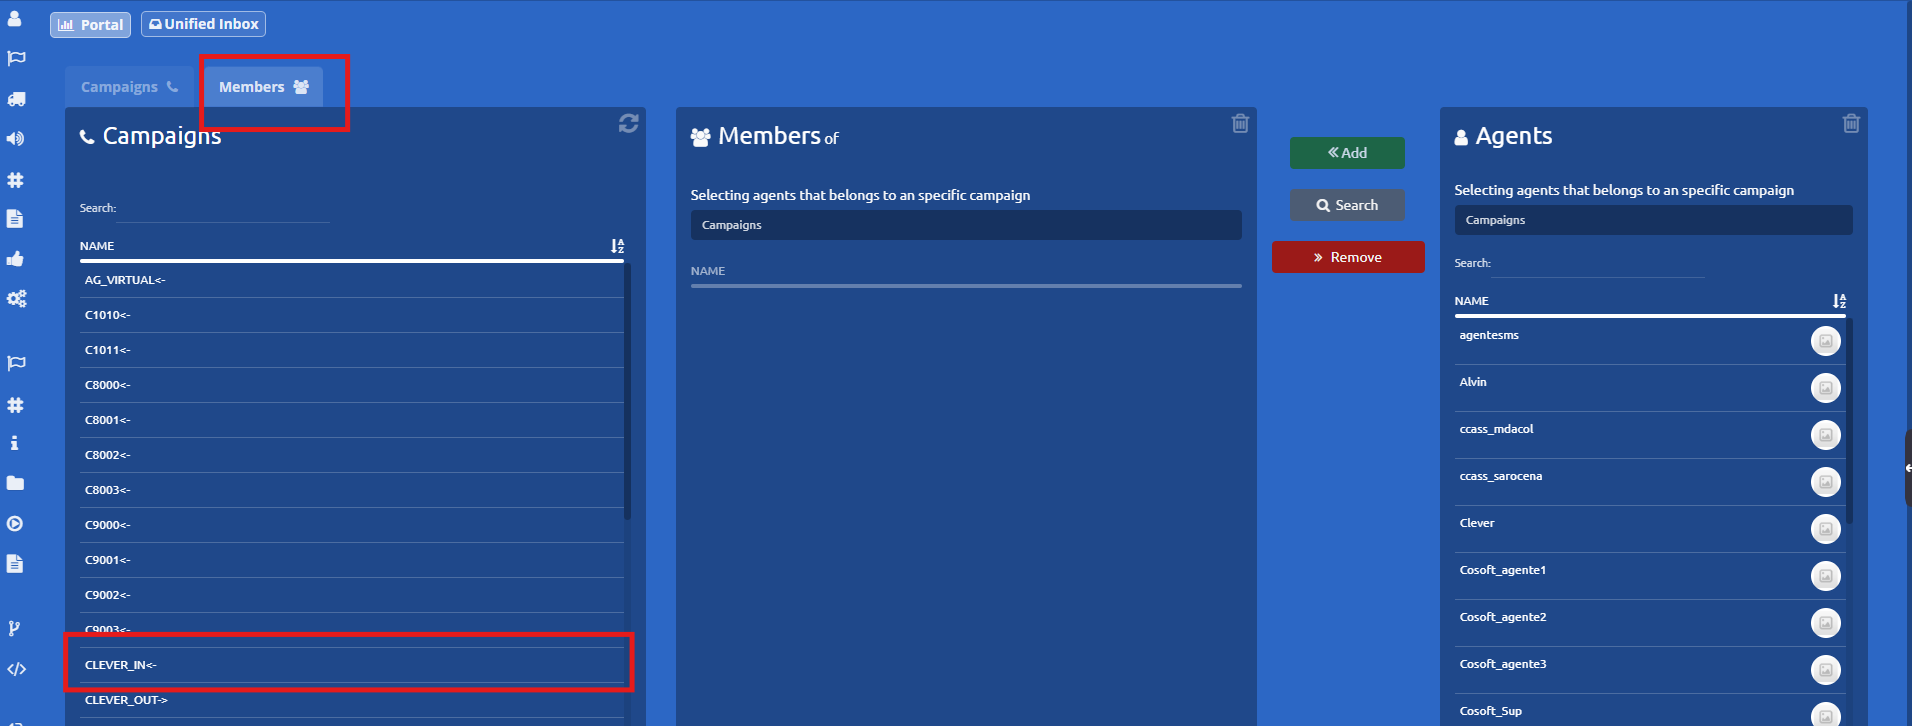
**2. Select the members tab,** locate and select the specific campaign you want to modify.
[](https://docs.cleverideas.ai/uploads/images/gallery/2026-04/9d1w3t3wKzlLe8dS-ldhuwpixasvuzxwq-2.png)
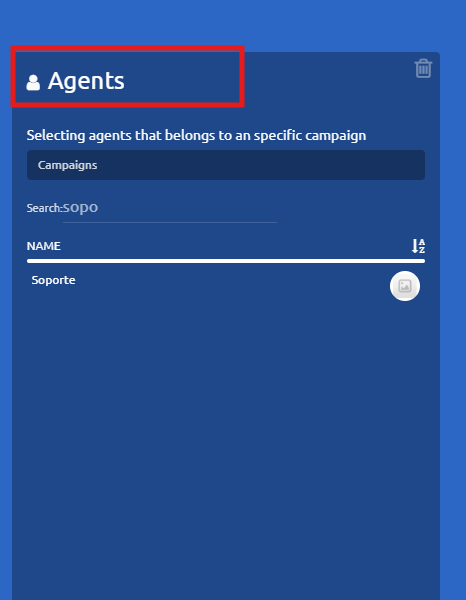
**3. Find the User** Search for the agent you wish to add from the available users list and click on their name.
[](https://docs.cleverideas.ai/uploads/images/gallery/2026-04/t7fB8meIielZvpsk-4.png)
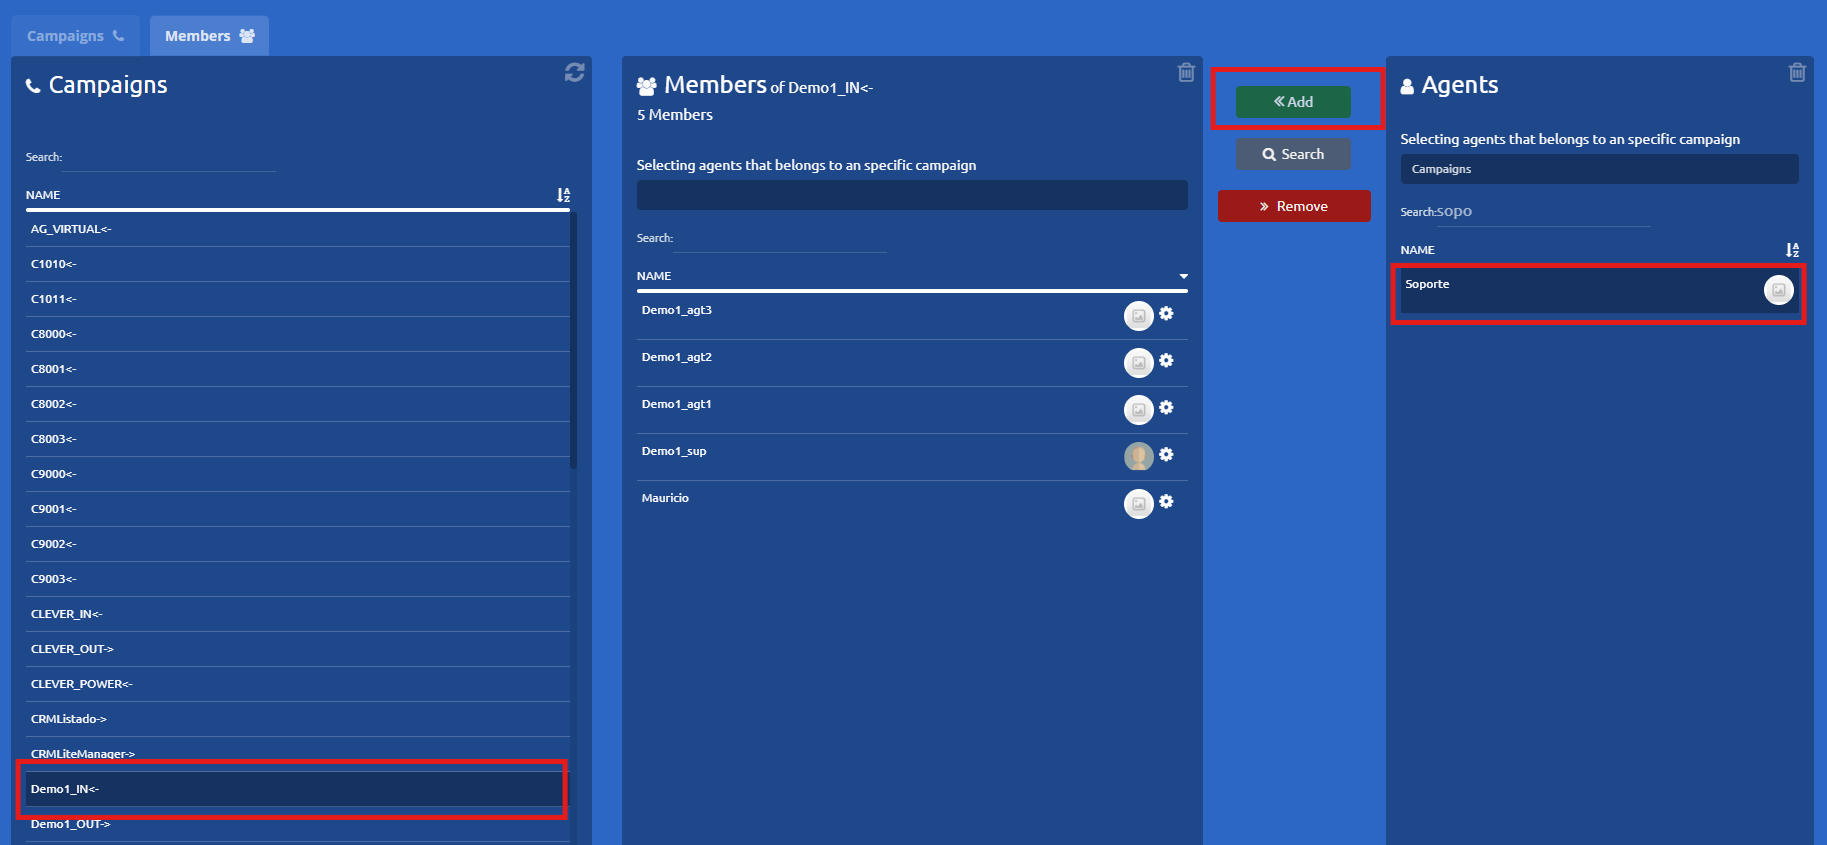
**4. Add the Agent** Once both the campaign and the agent have been selected, click the **Add** button.
[](https://docs.cleverideas.ai/uploads/images/gallery/2026-04/g5hfX0ZgB3CtZuX5-5.png)
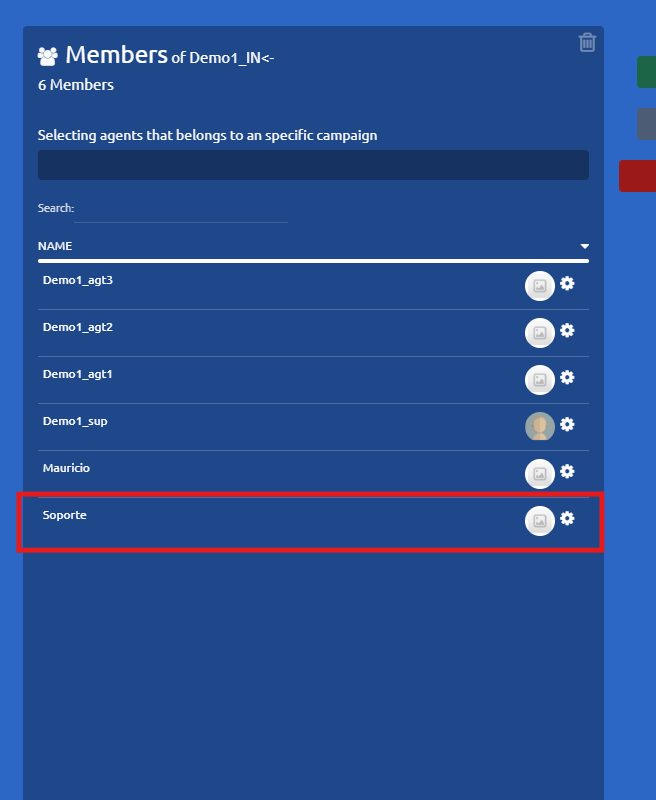
**5. Verify the Addition** Double-check that the user now successfully appears within the campaign's active list of agents.
[](https://docs.cleverideas.ai/uploads/images/gallery/2026-04/RbuxXHzmv86MIaYN-6.png)