Guías
Guías de uContact
- Conference Calls - ENG
- Llamadas de transferencia - ESP
- Transfer calls - ENG
- Cómo configurar un "Holiday" en Campañas
Conference Calls - ENG
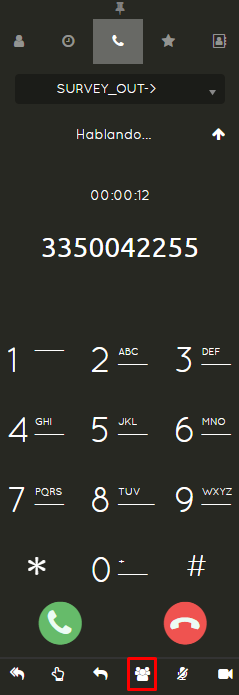
- Step 1: Initially, when the call is in progress and to initiate a conference or a multi-way call, we will press the fourth icon shown at the bottom of the Softphone, (Conference Button):
Subsequently, the client/bank or whoever we were talking to will move to the conference room, and apparently the Softphone will end the call.
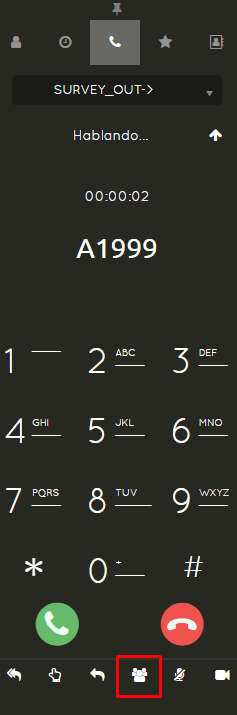
- Step 2: Then we will make a call to another telephone number, which we also need to bring into the conference. And so on with all the participants we need to add.
We will apply step 1 to the calls that we need to bring into the conference, as many times as necessary.
- Step 3: Once we have sent the required calls to the conference and without having any active call, we will press the conference button, which will send us to the conference room where both people from the previously sent calls are already present.
It's important to mention that the people/calls sent to the conference, while in the waiting room, will not be able to hear each other until the administrator joins the conference. Only then will the call have group communication between all participants.
The administrator can remove the last person who entered the conference by pressing *3, and so on if it's necessary to remove the last participants entered. Otherwise, they can simply end the call.
Llamadas de transferencia - ESP
En uContact, existen dos funcionalidades que nos ayudarán a realizar transferencias efectivas de llamadas.
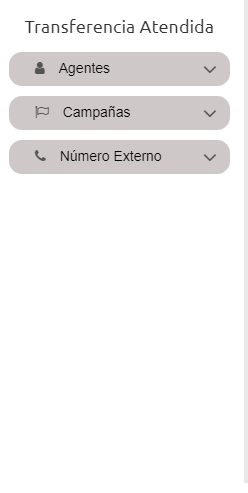
Transferencia Atendida
- Esta transferencia, como el nombre lo indica, debe ser atendida por la persona destino a la que se le esta transfiriendo la llamada, permite la comunicación entre quien transfiere y quien recibe la transferencia y mientras este ultimo no atienda la llamada, la transferencia no se completará.
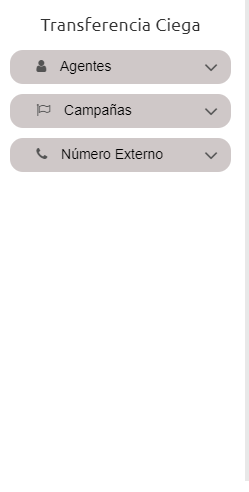
Transferencia Ciega
- A diferencia de la transferencia atendida, en esta no se toma en cuenta si el destino esta disponible para atender la llamada, simplemente se transfiere. Si es a un agente o campaña, y en ese momento no puede ser atendida, se irá a la cola del agente o la campaña respectivamente. En esta transferencia no habrá comunicación entre quien transfiere y el destino.
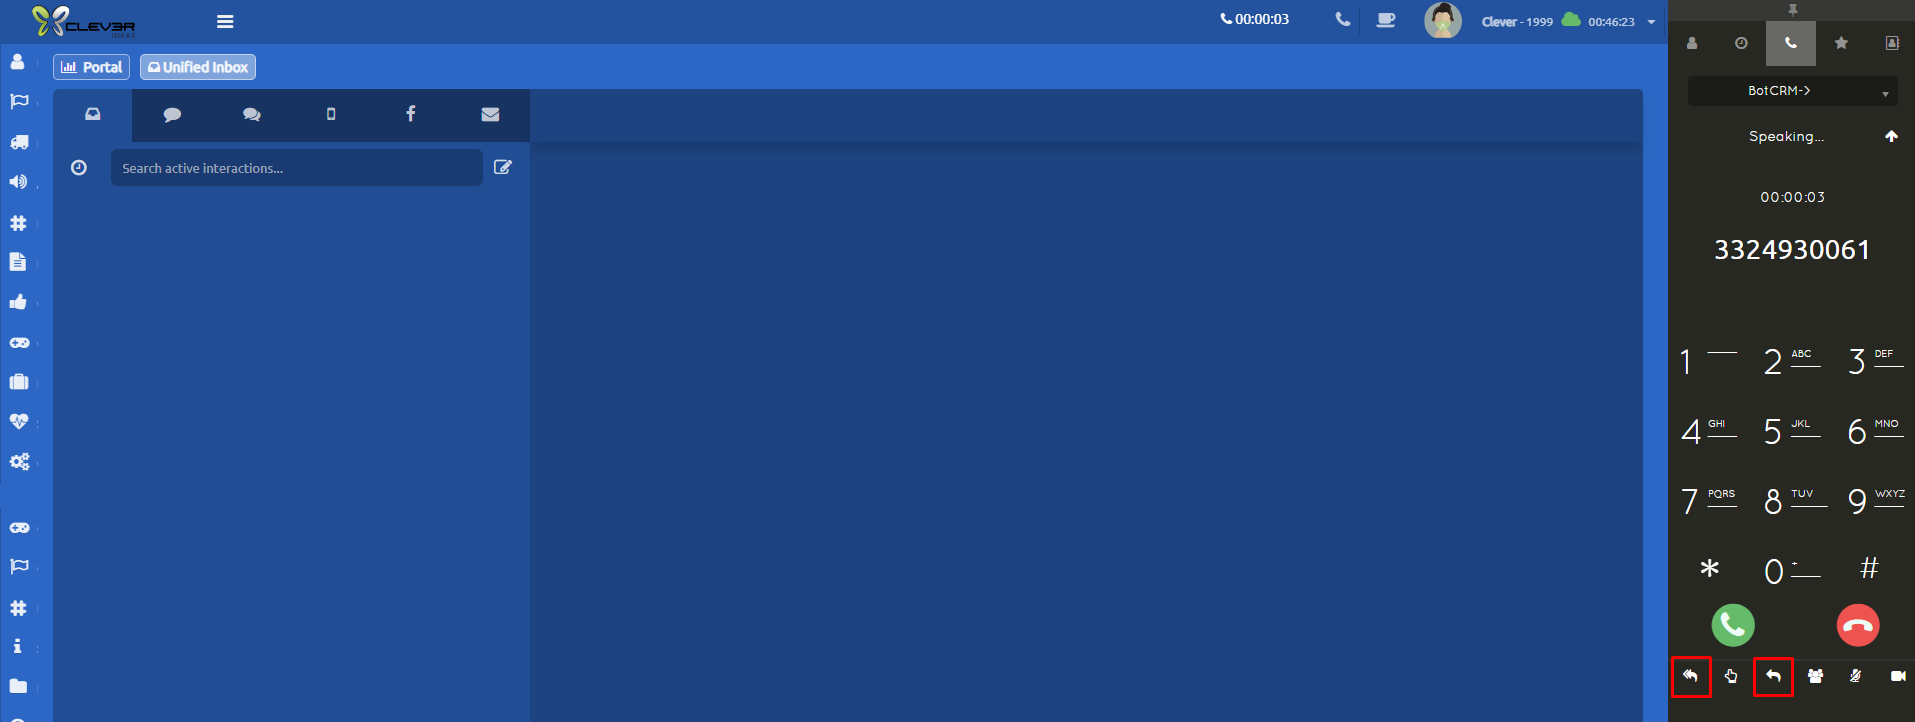
Los botones de ambas transferencias se encuentran en la barra de herramientas del Softphone.
La transferencia atendida se encuentra como primera opción, se muestra el icono de dos flechas.
La transferencia ciega se encuentra como tercera opción, se muestra el icono de una flecha.
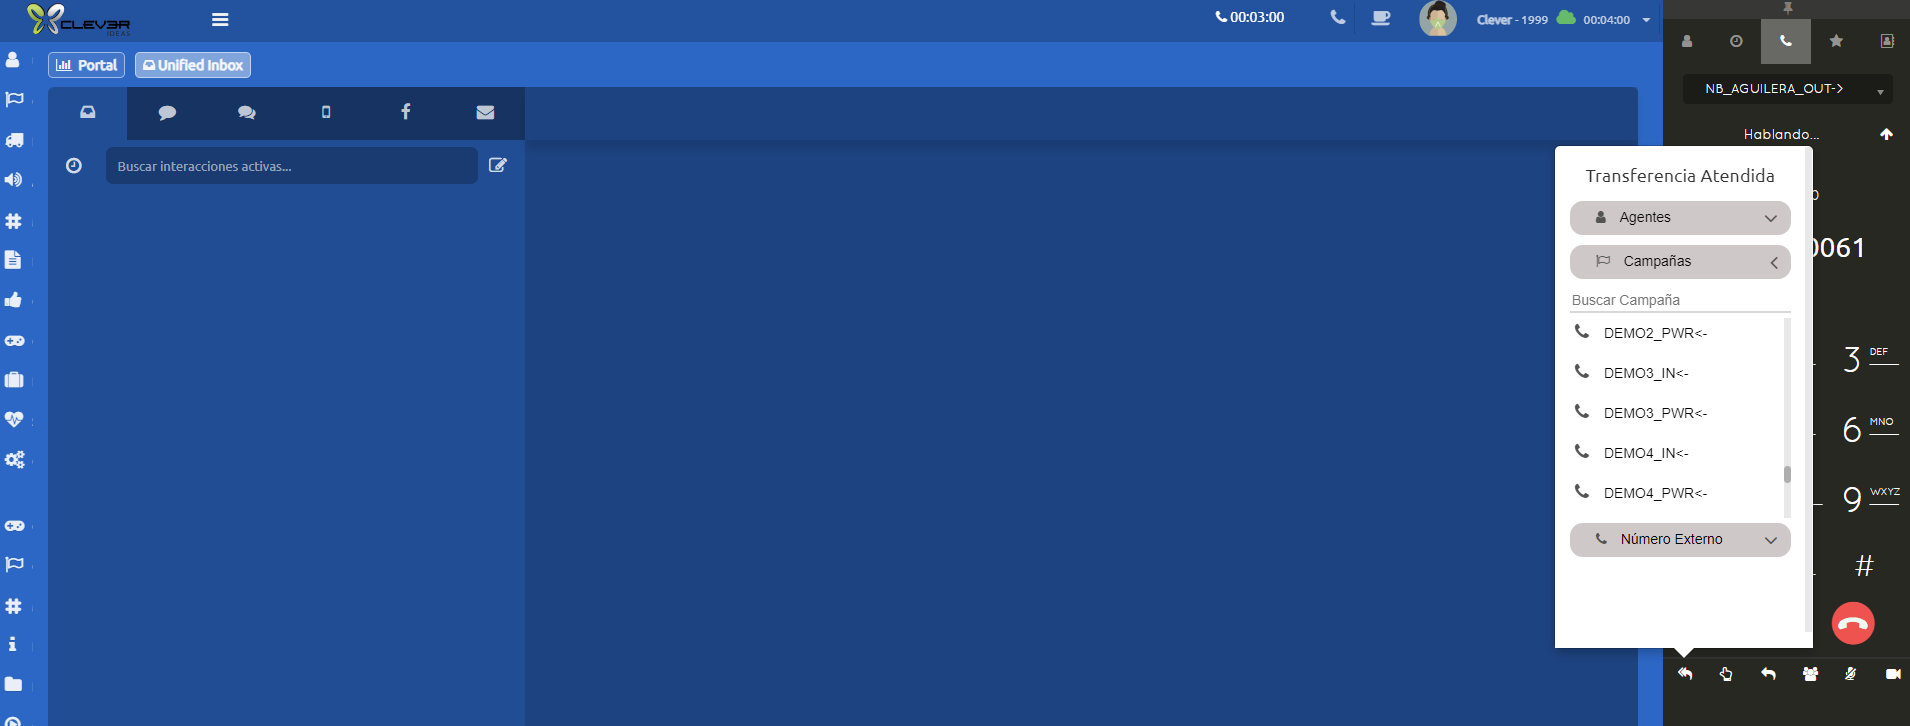
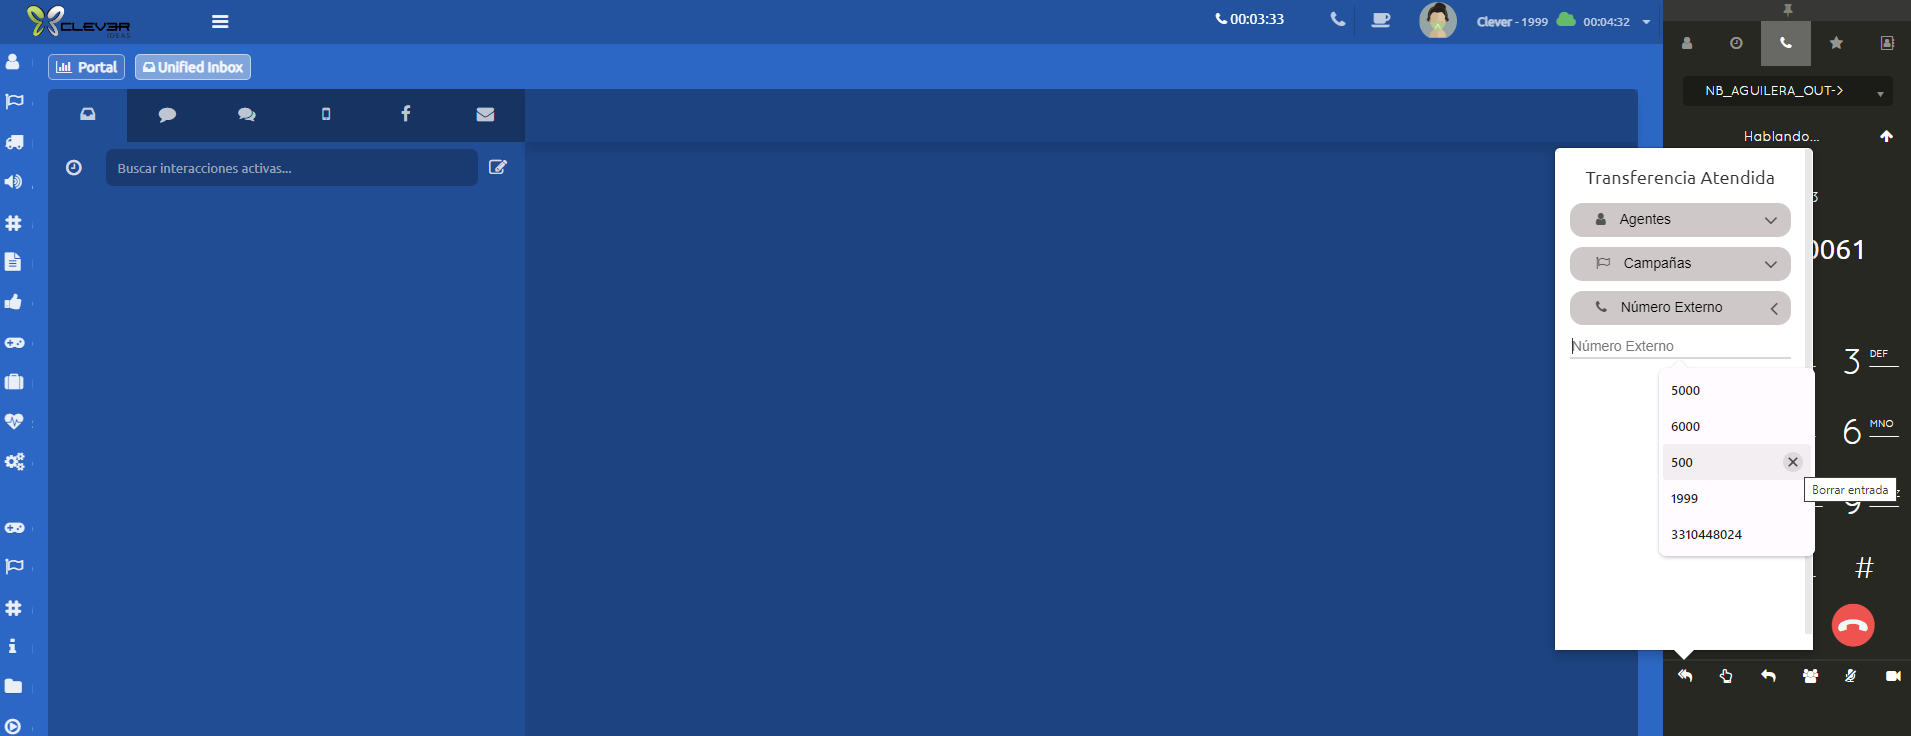
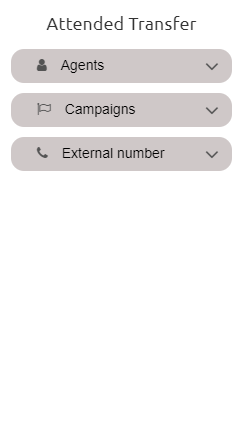
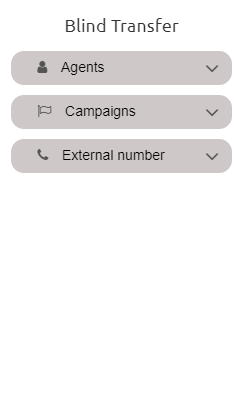
Al seleccionar cualquiera de los dos iconos de transferencia, ya sea Atendida o Ciega, se desplegará el siguiente menú, en el vendrán 3 opciones de destinos a los que se pueden transferir. Agentes, Campañas y Número Externo.
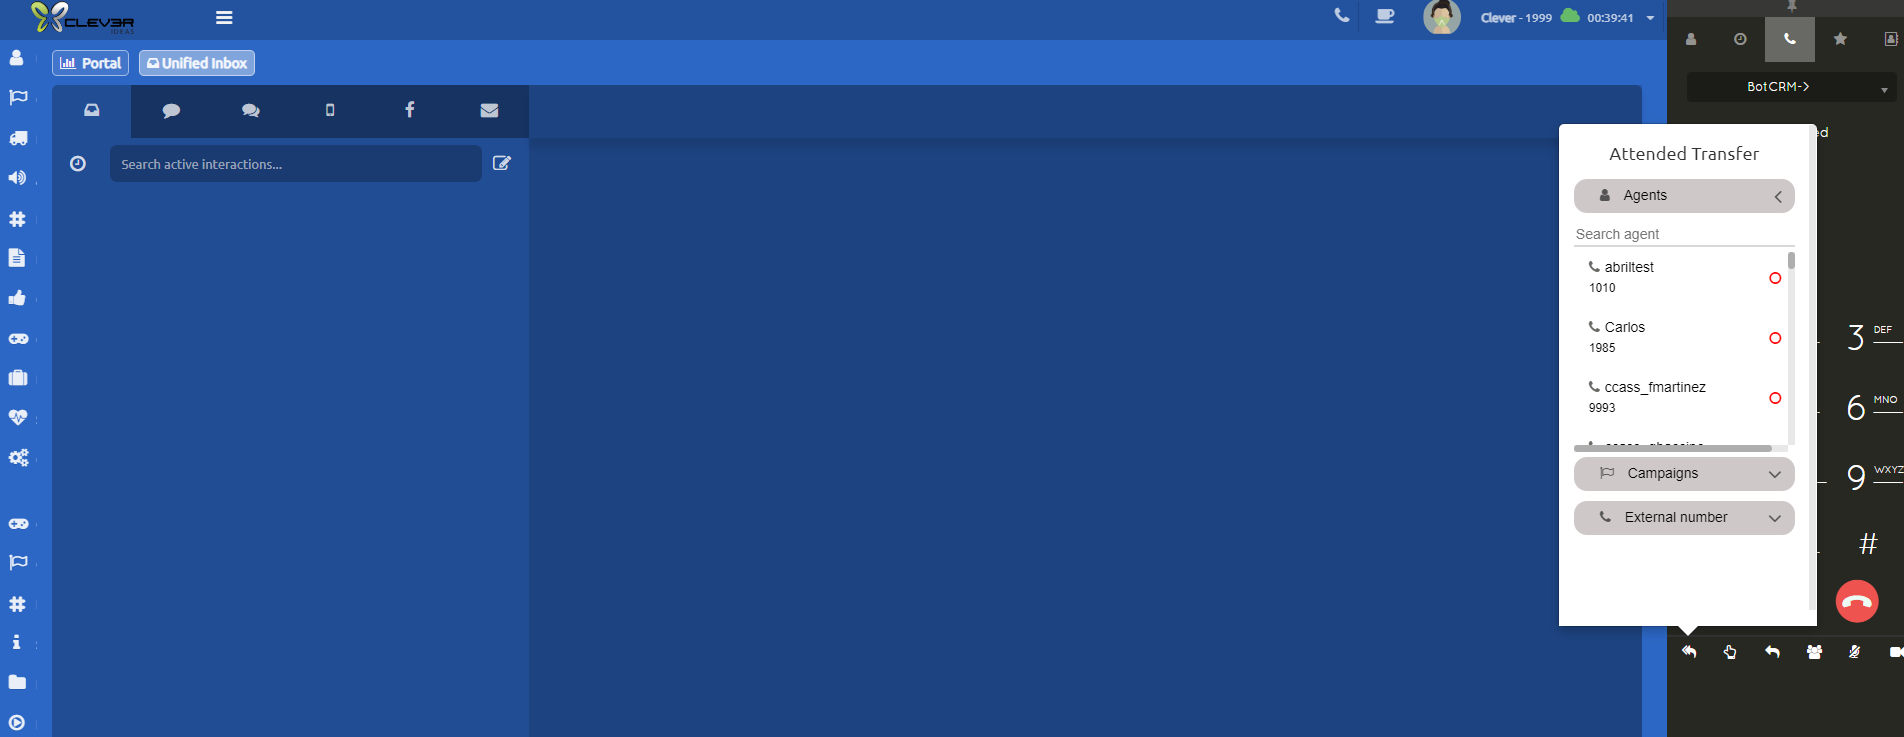
- La opción de Agentes desplegara todos los agentes y sus estatus, si están desconectados, en línea u ocupados ya sea en llamada o alguna pausa, (esto dependerá de los permisos asignados en los grupos de seguridad).

- La opción de Campañas desplegará todas las campañas a las cuales puede transferir, (esto dependerá de los permisos asignados en los grupos de seguridad).
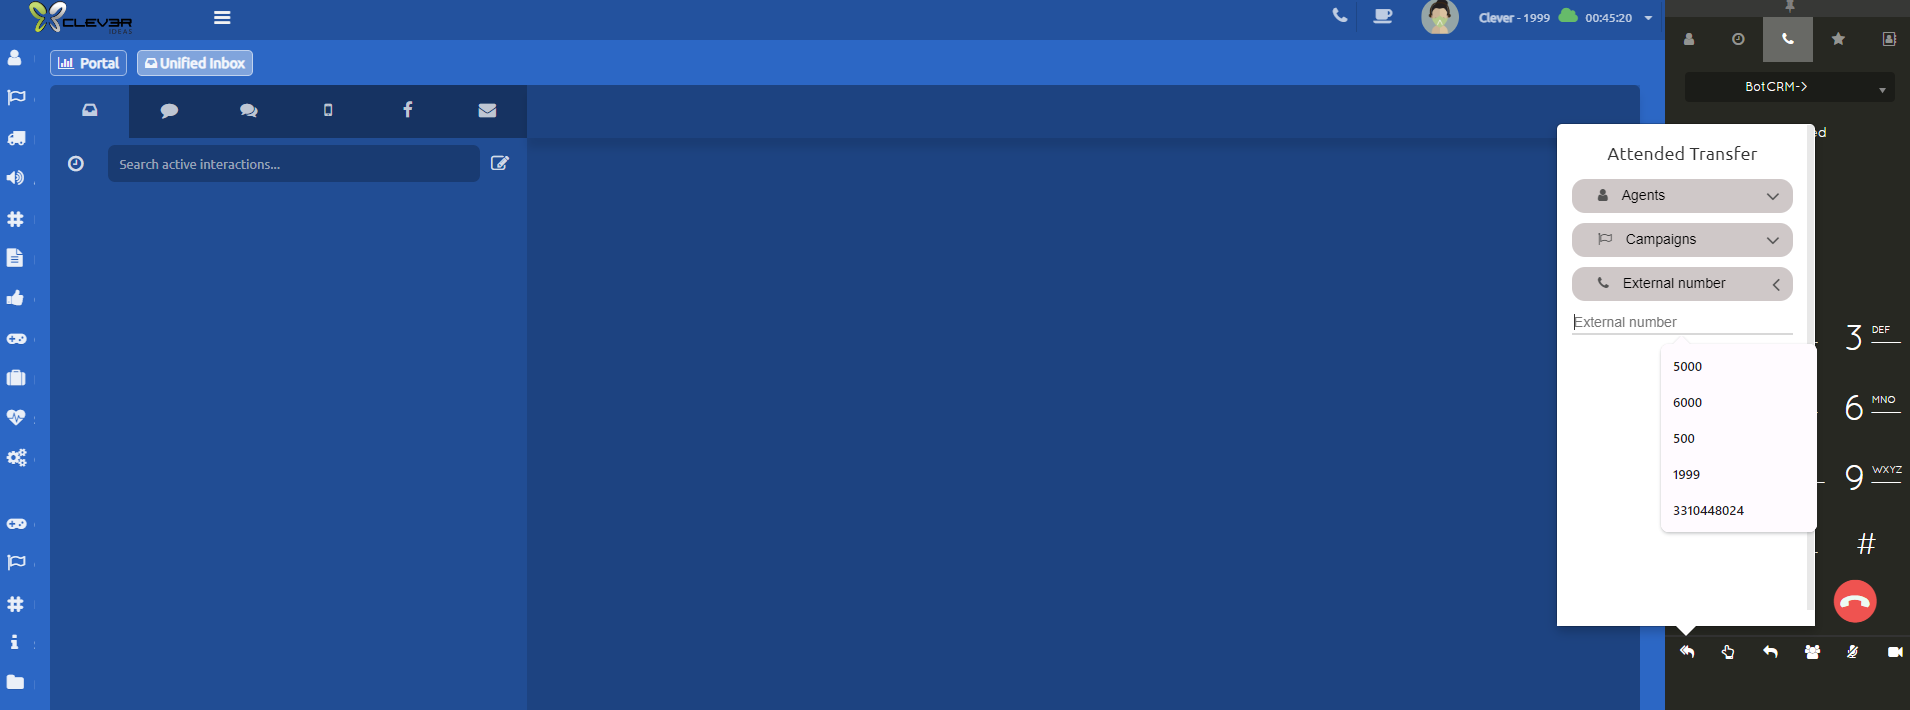
- En la opción de Número Externo, podremos enviar la llamada a cualquier número telefónico externo a uContact, el numero deberá ser marcado a 10 dígitos. También podemos seleccionar esta opción y transferir a la extensión directa de un agente, pero esto también dependerá de los permisos asignados en los grupos de seguridad.
Transfer calls - ENG
In uContact, there are two features that will help us perform effective call transfers.
Attended Transfer
This transfer, as the name indicates, must be answered by the destination person to whom the call is being transferred. It allows communication between the person transferring and the person receiving the transfer, and until the latter answers the call, the transfer will not be completed
Blind Transfer
-Unlike the attended transfer, in this one it does not matter if the destination is available to take the call; it is simply transferred. If it is to an agent or campaign, and at that moment it cannot be attended to, it will go to the agent's or campaign's queue, respectively. In this transfer, there will be no communication between the person transferring and the destination.
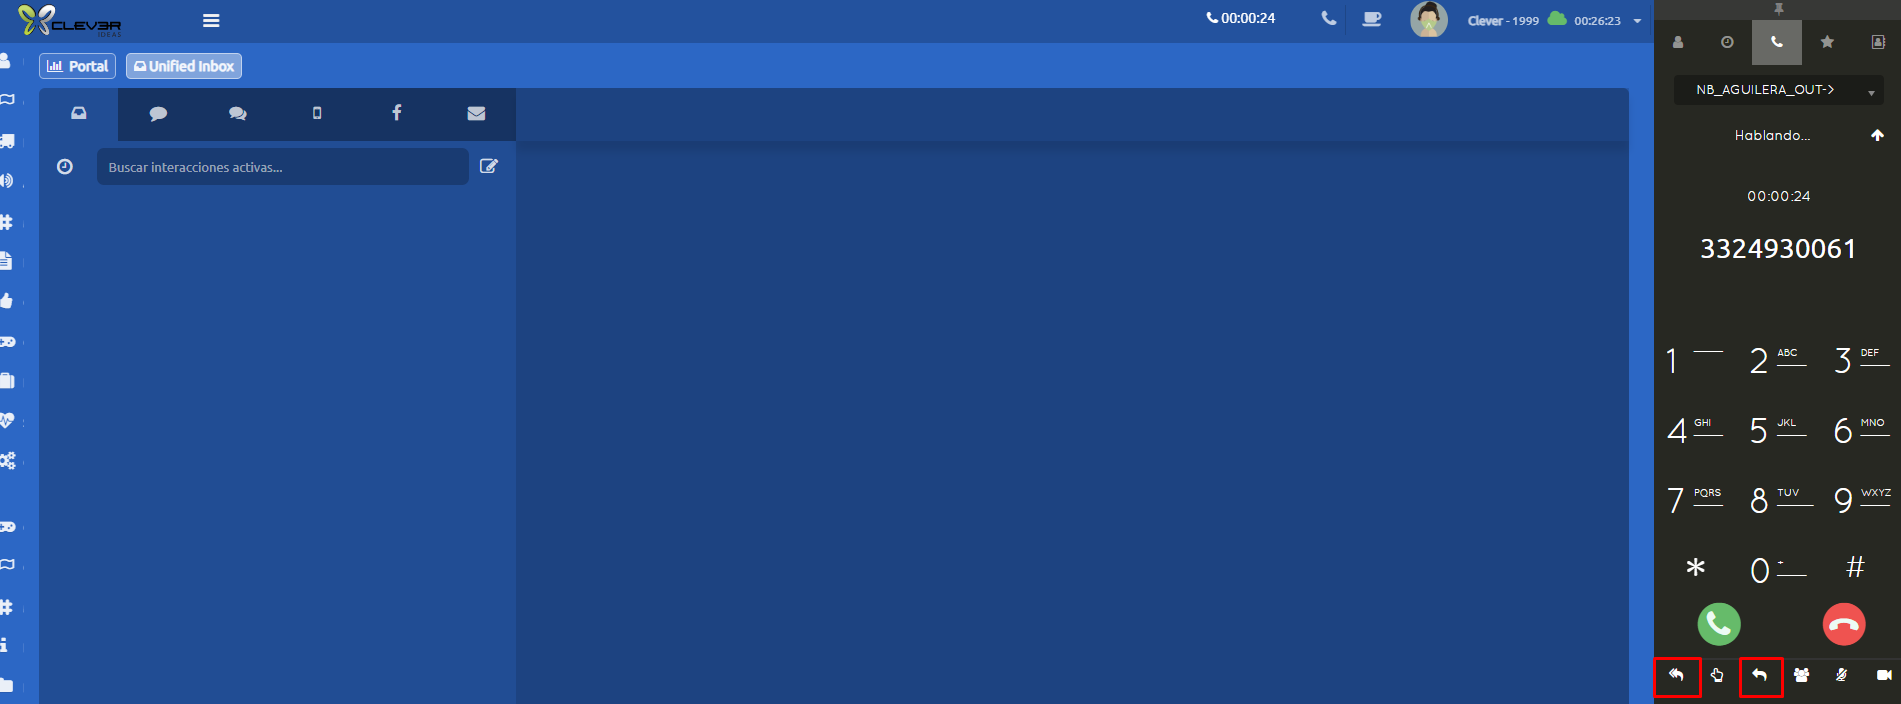
The buttons for both types of transfers are located in the Softphone toolbar.
The attended transfer is the first option, showing an icon of two arrows.
The blind transfer is the third option, showing an icon of one arrow.
When selecting either of the two transfer icons, whether Attended or Blind, the following menu will be displayed, offering 3 destination options for the transfer: Agents, Campaigns, and External Number
- The Agents option will display all agents and their statuses, whether they are offline, online, or busy either on a call or on a break, (this will depend on the permissions assigned in the security groups).
- The Campaigns option will display all campaigns to which you can transfer (this will depend on the permissions assigned in the security groups).
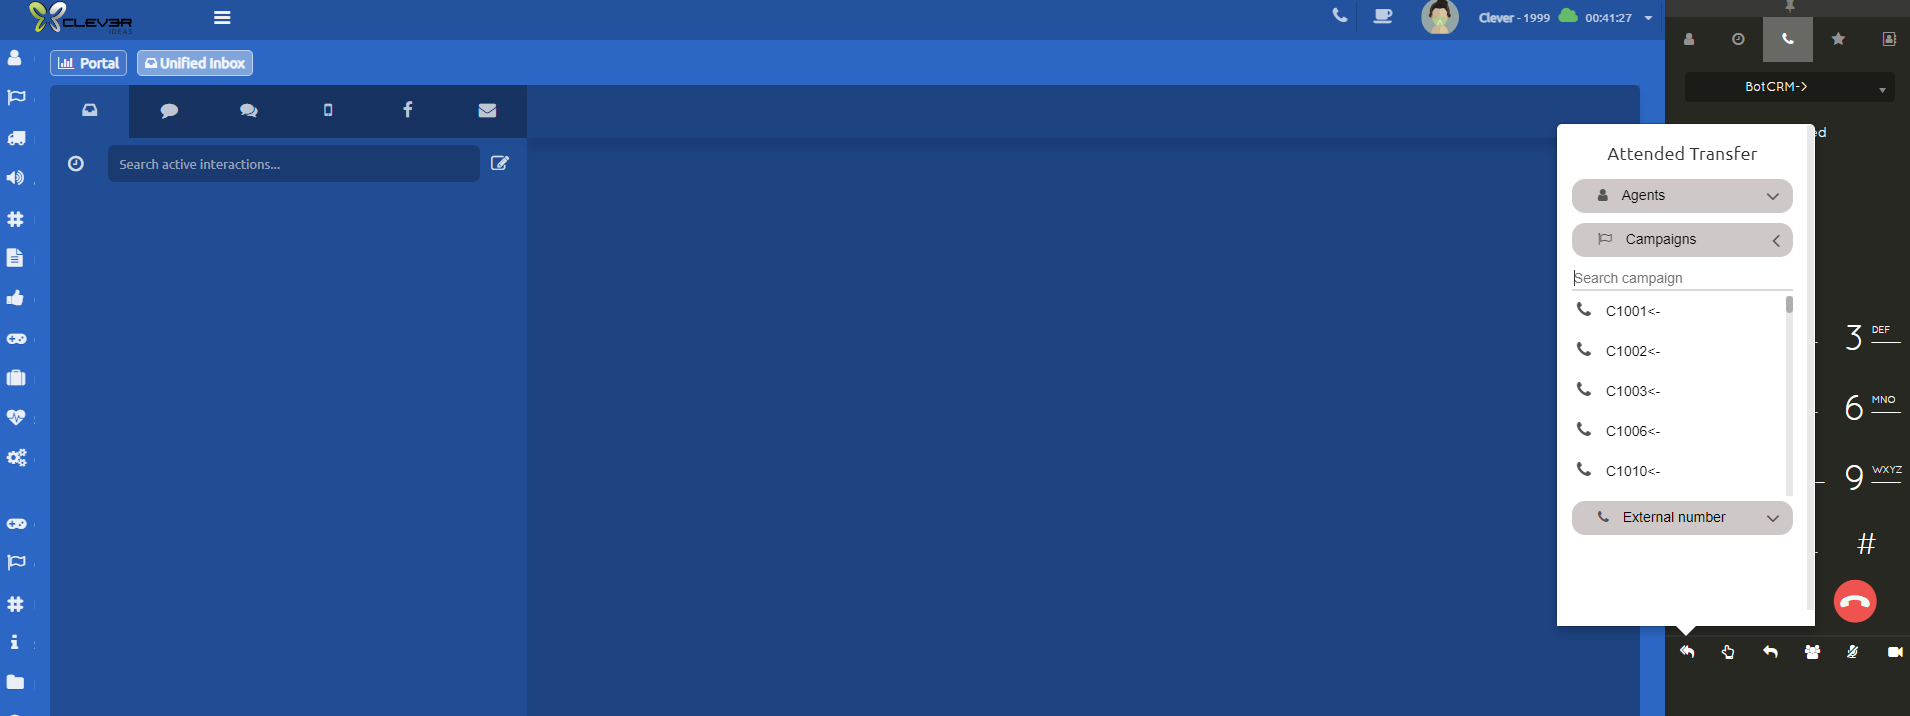
- In the External Number option, we can send the call to any external phone number outside of uContact. The number must be dialed with 10 digits. We can also select this option to transfer to an agent's direct extension, but this will also depend on the permissions assigned in the security groups.
Cómo configurar un "Holiday" en Campañas
Requisito previo indispensable: Para poder llevar a cabo este procedimiento, es obligatorio iniciar sesión en la plataforma con un Perfil de Supervisor.
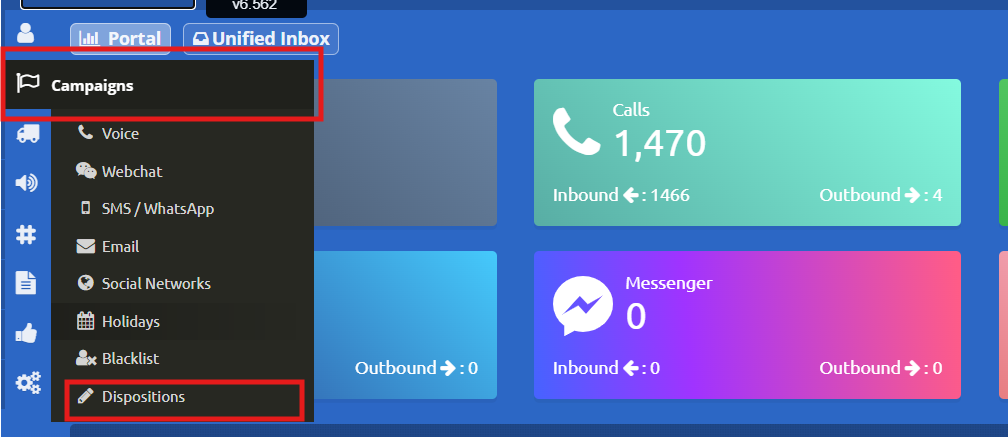
- Dirígete al menú principal del sistema y selecciona la opción Campañas. A continuación, haz clic en el submódulo Holidays.
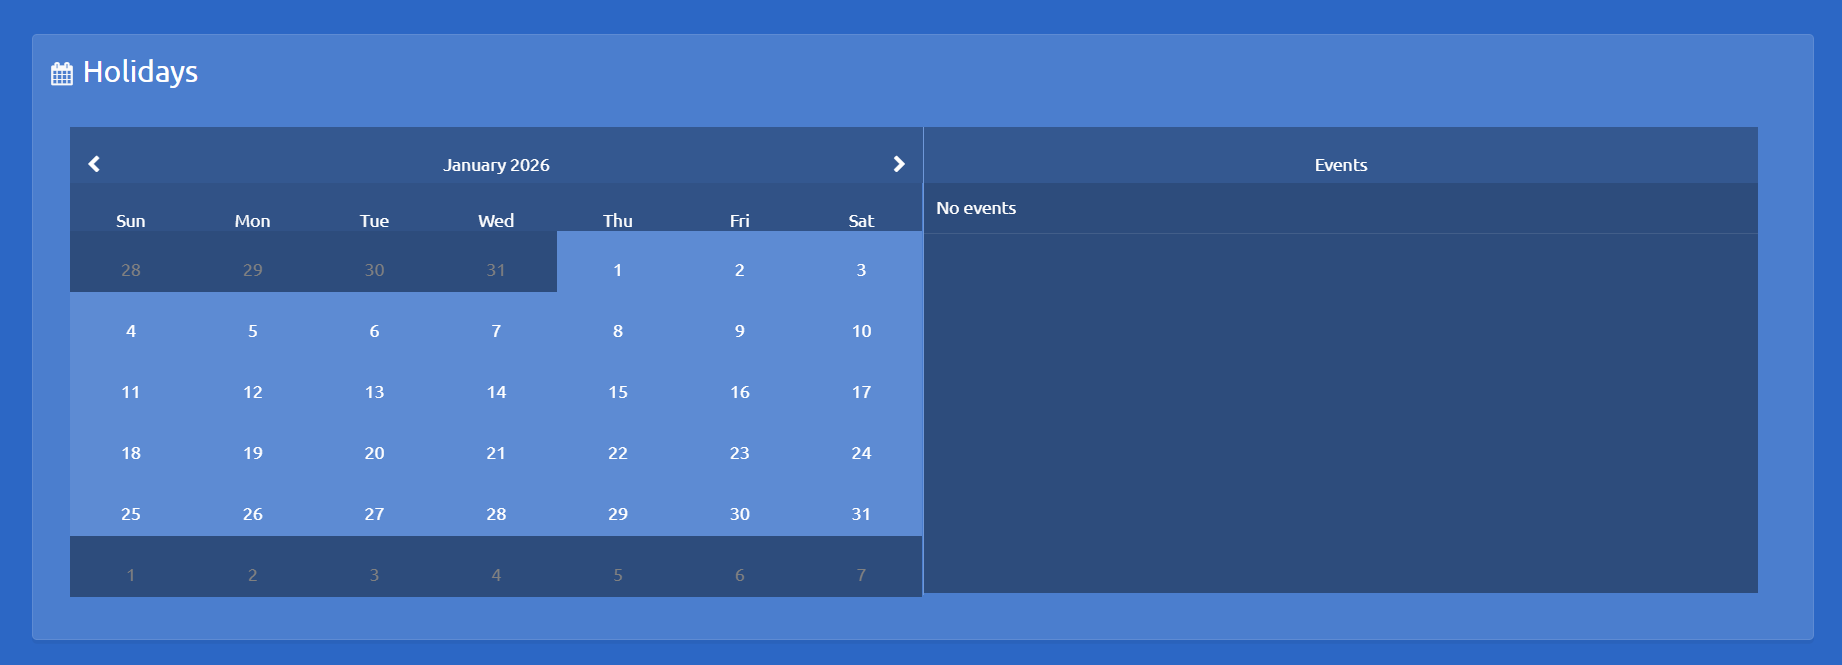
2. Dentro del apartado de Holidays, localiza y selecciona el día específico que deseas configurar o agregar, al hacer clic sobre el día, se desplegará automáticamente el menú de configuración.
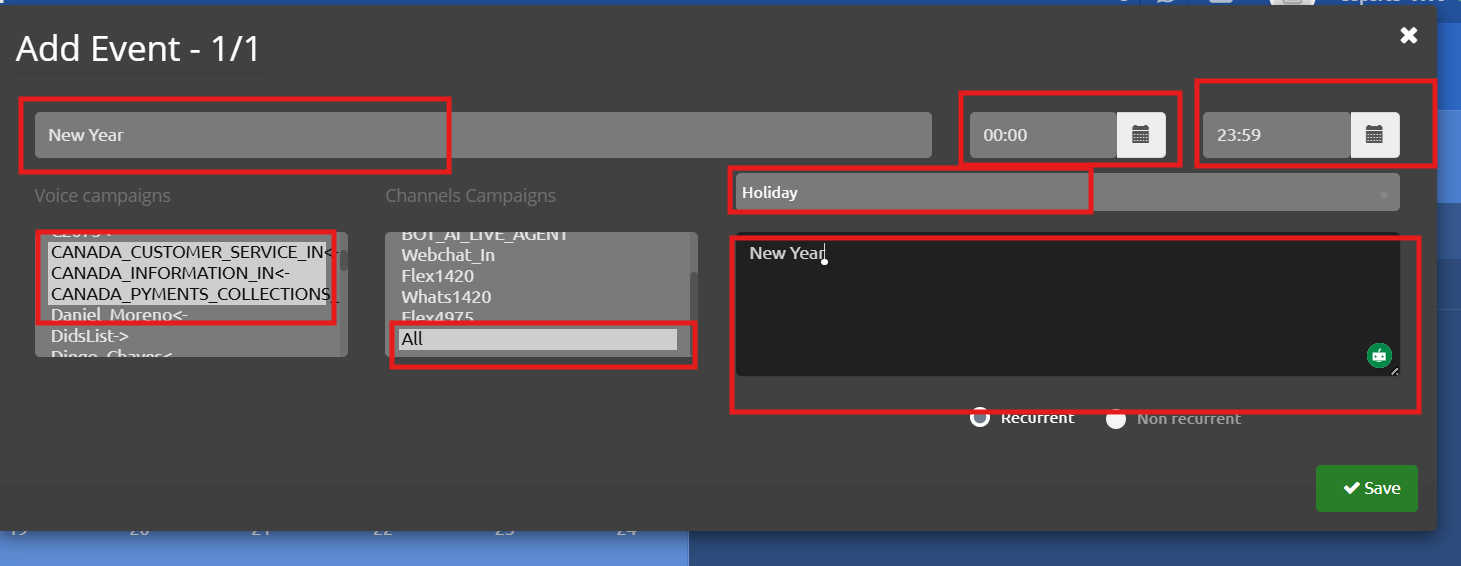
3. Completar los detalles de la configuración: En el menú desplegado, llena los siguientes campos requeridos:
-
Descripción de la campaña: Asigna un nombre claro para identificar el día festivo.
-
Campañas aplicables: Selecciona las campañas específicas en las que este holiday tendrá efecto (presiona la tecla Ctrl para seleccionar múltiples campañas)
-
Canales aplicables: Elige los canales de comunicación donde estará activa la configuración.
-
Horario: Define el rango de horas exacto en el cual aplicará el día festivo.
-
Sonido: Selecciona la pista de audio correspondiente.
-
(Nota: El archivo ha sido cargado previamente a la base de datos de sonidos, con el nombre "holiday").
-
-
Mensaje: Redacta el mensaje.
- Marcamos la opción Recurrent(Se repetira cada año) o Not Recurrent.
-
Guardar los cambios