WEBCHAT
Respond to customer inquiries directly through your website.
Profiles
Agent
This section shows the Webchat interaction from the agent profile.
Interaction View
The agent will have access to different interactions in their inbox and will be able to search for them by campaign name or user name.
When an interaction is opened, it expands on the right side of the screen, displaying the conversation and customer information at the top.
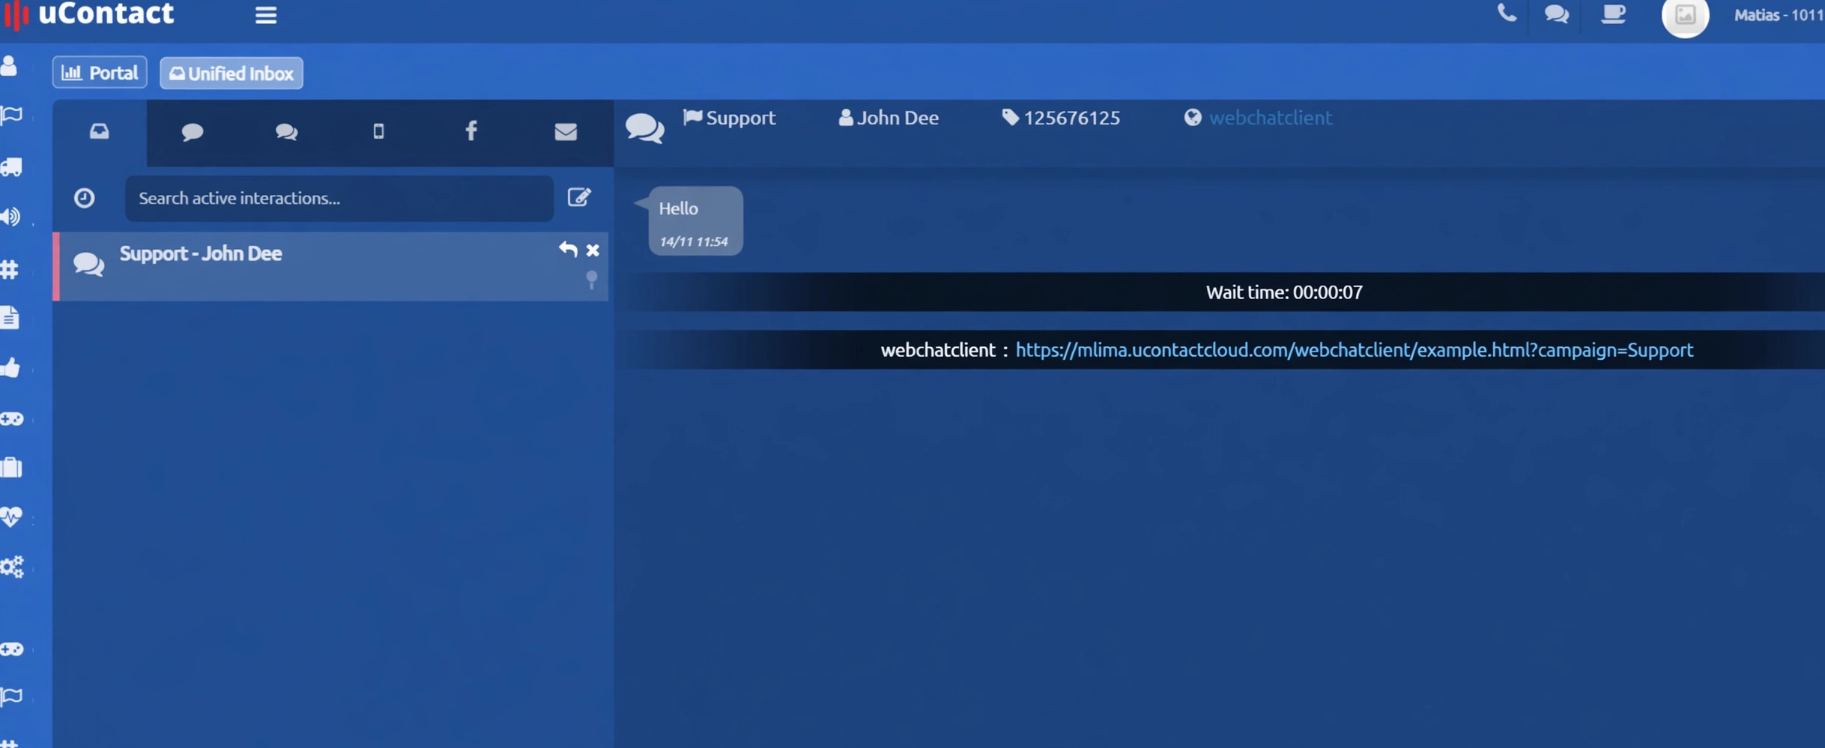
- Webchat Campaign Name
- Contact Phone Number
- Contact Name
- Contact Email
At the beginning of the conversation, the customer’s waiting time is displayed, showing the time elapsed from when the message was sent until the interaction was answered by an agent.
Interaction Options
The customer will be able to make voice calls and video calls with the agent.
The first option is the emoji icon. When clicked, it displays a list of emojis that can be used in messages.
To the right, next to the message input box where the agent responds to the customer, there is an icon containing the campaign’s predefined responses. Once selected, these responses are automatically inserted into the message.
Next to it, there is the icon for sending voice messages.
To the right, there is the button for attaching files.
In the upper-right corner, the agent will find a three-dot menu icon that allows access to the customer’s previous messages.
Supervisor
Webchat Campaign Monitoring
This section displays real-time statistics for Webchat campaigns. It shows the current status of each Webchat campaign in real time, based on the parameters configured during campaign creation.
Bottom-left table

Icon: Agent status icon. It may display a phone icon when the agent is on a call, or the corresponding break icon when the agent is in a pause state.
Channels: If the agent is handling an active interaction, the corresponding channel logo will be displayed (SMS, Webchat, among others). Multiple channel icons may appear simultaneously when applicable.
Status: Real-time agent status. Available statuses include: Disconnected, Busy, Available, Available on Break, and Busy on Break (where “Break” refers to any configured break status).
Agent: Name of the agents assigned to the campaign.
Completed: Number of completed interactions per agent.
Active: Displays the number of active interactions currently assigned to the agent.
Time: Displays the time elapsed since the agent’s last status change.
Interaction Status
Displays the status of the active interaction based on the time thresholds configured in the Campaign Settings under Chat Time. The available interaction statuses are as follows:
- The interaction status will be displayed in green while it remains within the first configured time threshold.
- The interaction status will be displayed in yellow while it remains between the first and second configured time thresholds.
- The interaction status will be displayed in red when it exceeds the second configured time threshold and beyond.
- When the agent does not have an active interaction and the third configured time threshold is exceeded, an alert will be displayed in the agent’s status.
Bottom-right table
If the campaign has customers waiting in the queue, the table on the right will be populated as shown in the following image.

This table displays each customer's email address, name, and the time they have been waiting for assistance.
Agent Actions
When you click on an agent with an active interaction, the following options will be displayed:

- Spy: Allows the supervisor to view, in real time, the messages exchanged between the agent and the customer.
- Screen Monitoring: Allows the supervisor to view the agent’s screen in real time. To display this option, Screen Monitoring must be enabled under Settings → Agents.
- Info: Displays a window containing the agent’s detailed information.
- Pause: Allows the supervisor to place the agent into a paused state.
- Log Out Agent: Allows the supervisor to log the agent out of the portal. The agent must sign in again using their username and password to resume work.
Webchat Client
Set up Web Page
This section explains how the call center should set up the web page, embedding uContact's Webchat for its correct use.
Clients should embed the following script.
<script src="https://serverID.ucontactcloud.com/webchatclient/integrawebchat.js"></script>
<script>
initwebchat({
    ip: "serverID.ucontactcloud.com",
    campaign: "campaignsName"
});
</script >
The first line represents the file inclusion that will be provided.
On the second line, the client must complete the following:
-
IP: where "serverID" is the IP address or domain of the server where webchat is going to be taking part.
-
campaign : where "campaignsName" is the webchat campaign's name configured in uContact's portal, from where the interactions will come and go.
It is necessary that from this public IP address, the following ports get redirected:
-
8089 TCP (SIP signposting through WebSocket) to the telephony server.
-
443 from webchat to uContact's server.
In order to use audio and video, the clients' webpage must be through HTTPS with the validated security certificate. A free one can be obtained through here: https://letsencrypt.org/
Incorporating Webchat using WordPress
In order to insert the webchat client on your webpage using WordPress, follow the next steps:
-
In uContac's portal, go to Webchat configuration for the campaign created.
Click on the WordPress plugin to download it. -
Log In to your WordPress account
-
Go to the Plugins' section on the left side menu

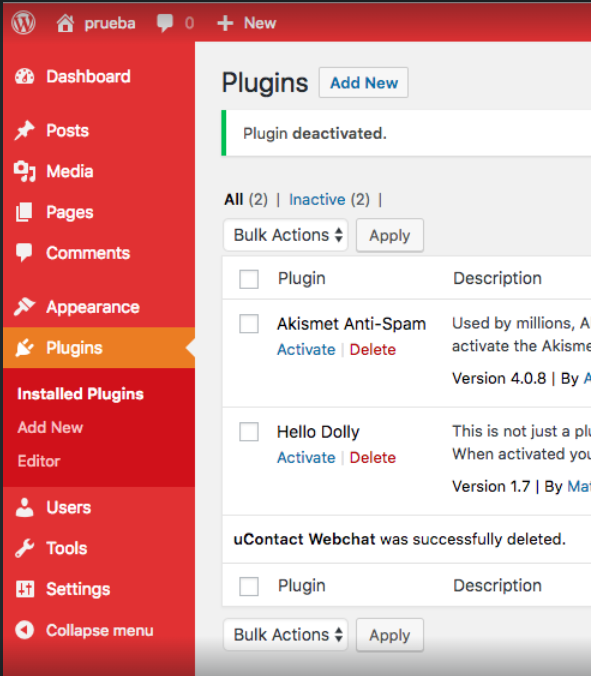
4.- Click on Add New to install the new plugin
5.- Click on Upload Plugin and upload the downloaded file from the first step
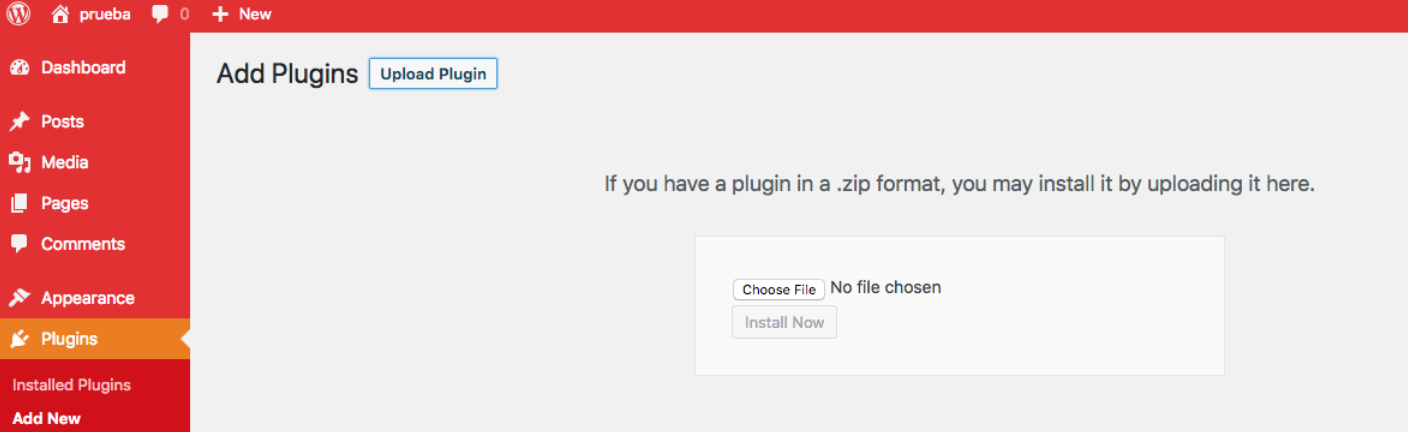
6.- Once uploaded, click on Install Now
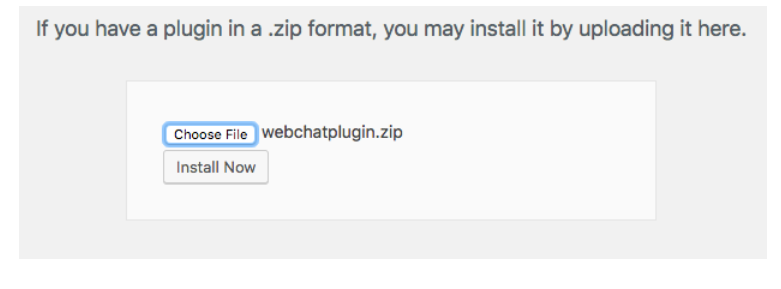
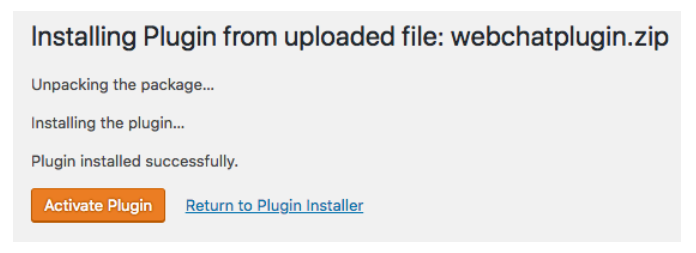
7.- When the installation is done, the following will appear, and then click on Activate Plugin
8.- Open the Settings section on the left side menu and go to Webchat Settings
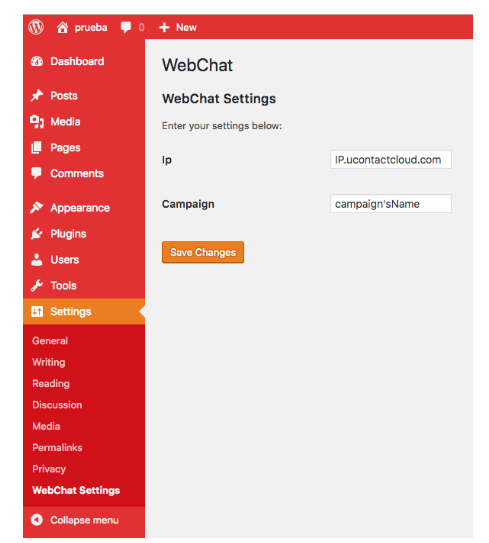
Open the Settings section on the left side menu and go to Webchat Settings
Campaign: Write the name of your webchat campaign configured in uContact's portal
And donde! The new plugin will appear on the installed plugins section and is ready to use.
Webchat's Web Page
Available campaign
When the campaign is available, the agents that are online can attend the incoming interactions.
The client can visualize the following pop-up:
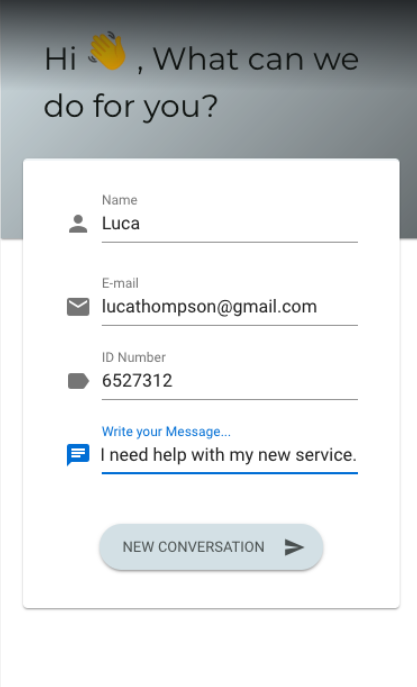
A welcome message configured in the campaign settings will appear on the top of the window. The client must complete all the required data and click on the Send button to start the interaction.
When the interaction gets sent, the client will be on the waiting pile. From this moment on, agent-client can exchange messages.
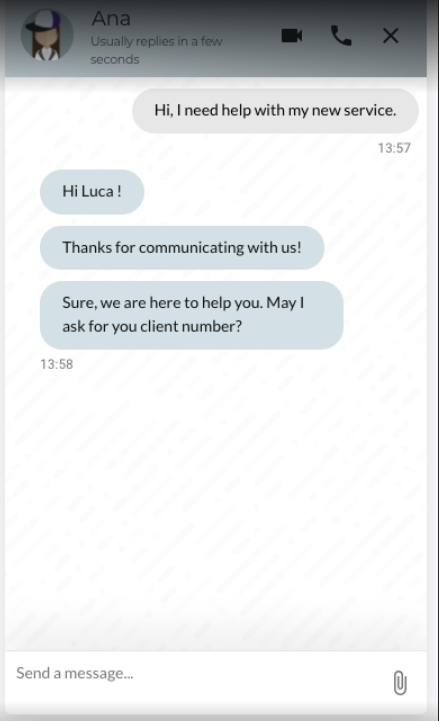
If the campaign configured allows it, the client can see the agent's name that attended the interaction.
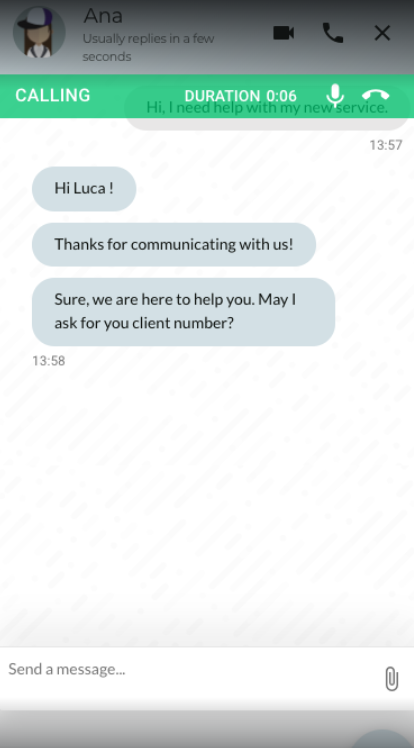
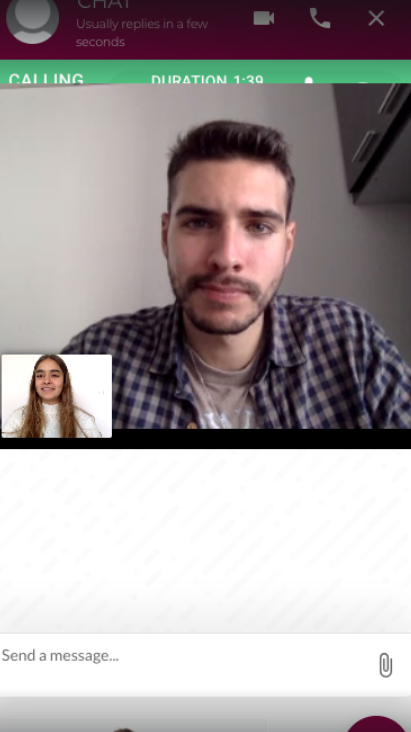
A video call and call options are available for the client to interact with the agent if these options are activated on the campaign configuration like is shown in the following picture:
Call
Video chat
If the client wants to close the interaction, just click on the cross on the top right side of the window. The client will see a pop-up window to confirm whether the agent wants to close the chat or not.
If the client cancels it, the conversation will continue without deleting any message.
Otherwise, if the webchat campaign is configured to allow feedback, the client can qualify the interaction, leave a personal opinion and receive a mail with all the messages in the conversation by clicking on this option checkbox.
Out of time campaign
If the campaign is not available, the client can send a message that will be seen in the recorded Webchat option.
A message will appear letting the client know that the campaign is out of time, like is shown below:

No agents available
If all the agents are unavailable, the Not Available message configured appear, like so:

Basic Settings
Administration
This feature enables real-time communication with customers through an online chat. Before using it, the required configurations described below must be completed.
- Name: The name used to identify the Webchat campaign within the system.
- Strategy: Defines the routing behavior the campaign will use when assigning interactions to agents.
- Service Level: Specifies the maximum time (in seconds) agents have to respond to interactions received by the campaign. If an interaction remains in the queue longer than the configured threshold, the service level will decrease. This metric can be monitored in the campaign's Supervisor Dashboard.
- Schedule: Defines the hours during which agents are available to handle interactions. If an interaction is received outside the configured schedule, the system will display an offline message informing the customer. This message can be configured using the Offline Message setting in the Advanced Settings section. Use the "+" button to add a schedule and the "-" button to remove the selected schedule from the list.
After saving the configuration, the campaign will be created in the system and displayed in the table on the right. This table lists all campaigns available in the system based on the user's assigned security group.
Webchat Audio and Video Calls
These features allow agents to communicate with customers through audio and video calls directly within their Clever Chat interactions.
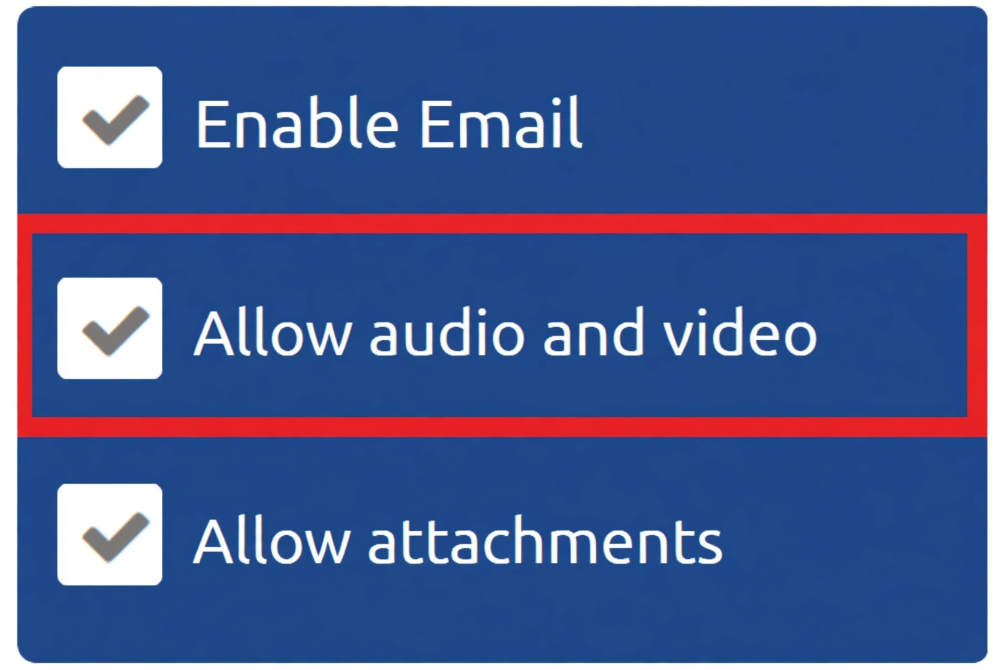
Before using these features, please consider the following requirements:
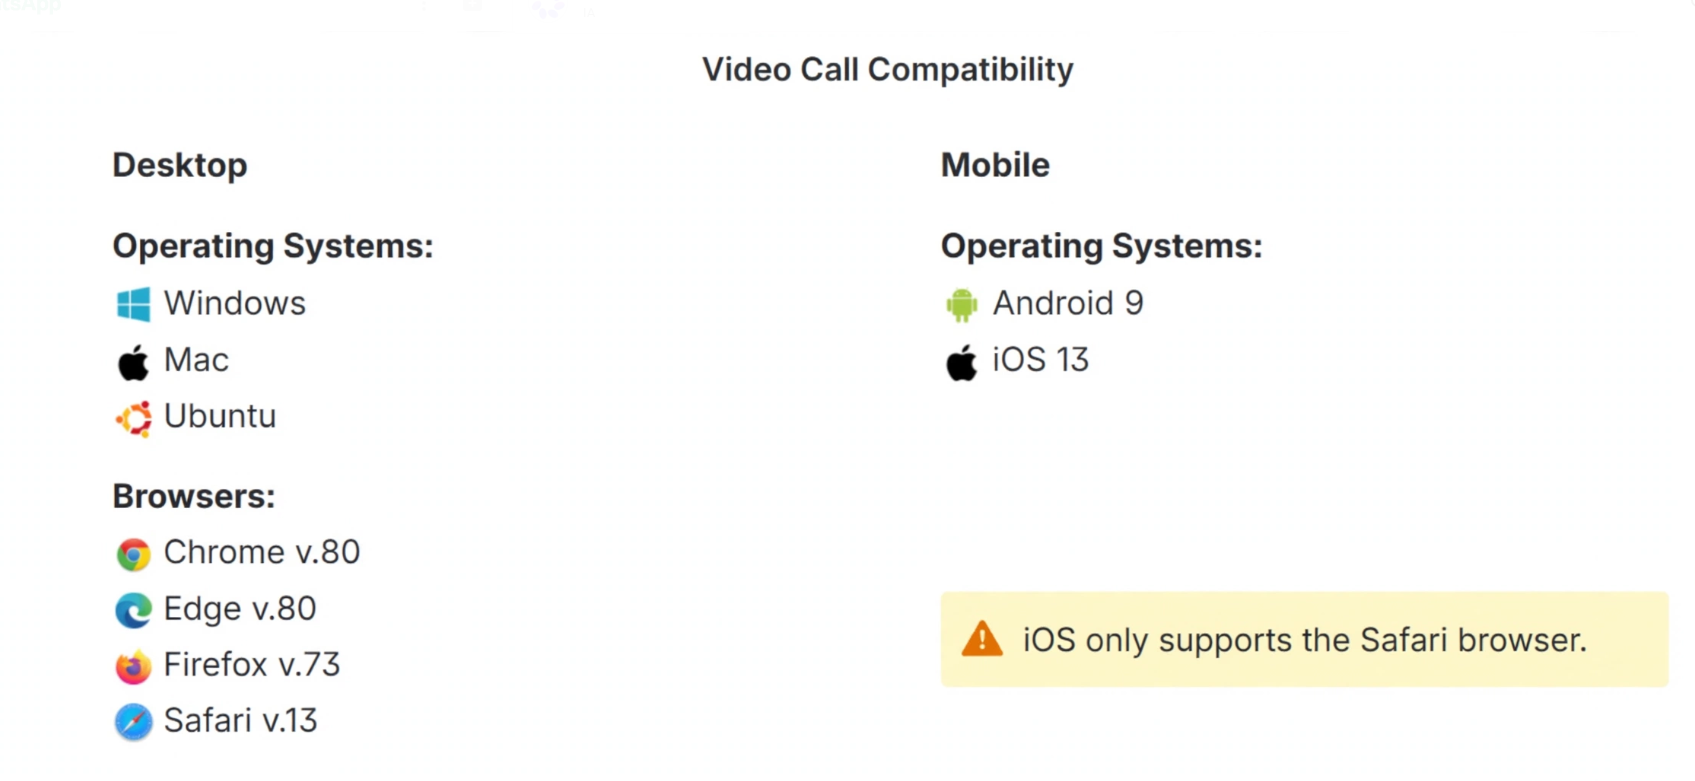
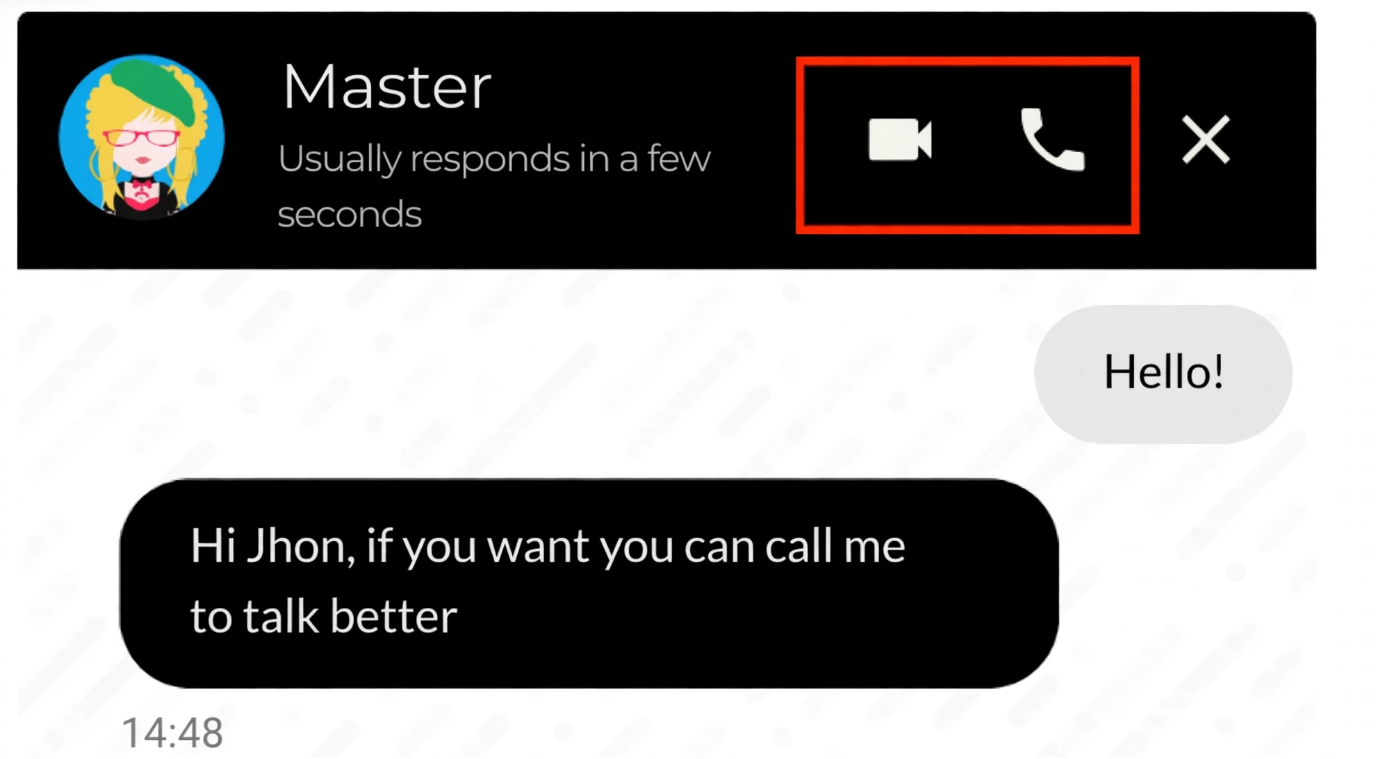
When the Allow Audio and Video option is enabled, customers will be able to see the audio and video call options in the upper-right corner of the Webchat interface after they are connected to an agent.
When the customer clicks either the audio or video call icon, the agent will immediately receive an incoming call notification. By accepting the notification, the agent and the customer will begin an audio or video call, establishing voice communication and, when applicable, a live video connection.
Bots in Clever Chat
Configurable Messages
Clever Chat provides several configurable messages that can be displayed or sent automatically at different stages of the customer interaction. For example, messages can be shown when no agents are available or when the campaign is outside its configured business hours.
Welcome Message
This message is displayed to customers when the Clever Chat campaign is available. Administrators can configure a custom welcome message for each supported language: Spanish (es), English (en), and Portuguese (pt). To do so, select the desired language and enter the corresponding welcome message.
Offline Message
This message is displayed to customers when the campaign is outside its configured business hours. Administrators can configure a custom message for each supported language: Spanish (es), English (en), and Portuguese (pt). To do so, select the desired language and enter the corresponding offline message.
This message is displayed when the maximum number of waiting interactions allowed by the campaign configuration has been reached. Customers attempting to access the chat will be notified with the message configured in this field.
Agent Automatic Message
This message is automatically sent to the customer when the interaction begins.
Offline Message
When the campaign is outside its configured business hours and this option is enabled, customers will be able to leave a message. The message can later be accessed and reviewed under the “Clever Chat Recordings” section.
Comments
At the end of the interaction, the message configured in this field will be displayed.