Meta Business Verification
A — If the customer does not have a Business Portfolio or Business Manager account
1. Create a Business Portfolio (Business Manager)

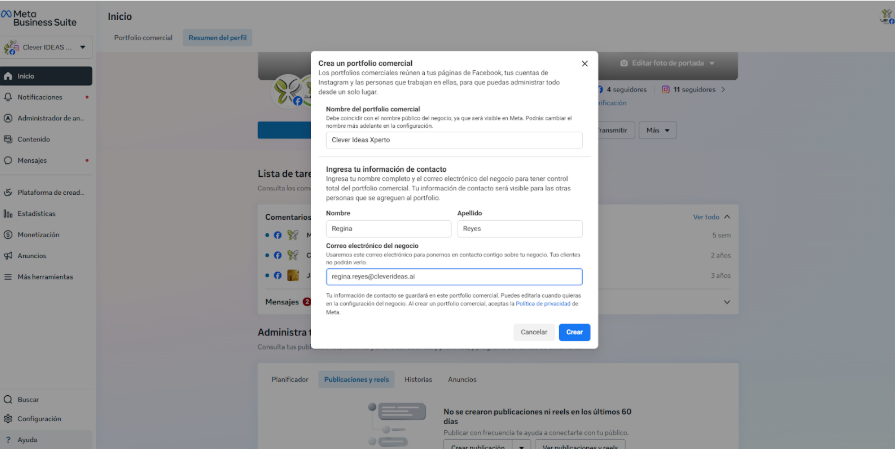
2. Complete the company profile (Business Information)
- Enter the following information: the exact legal business name, registered business address, contact phone number, business website, and business email address. This information must exactly match the legal documents and the information published on the company's website.

3. Assign at least one Business Admin
- Ensure that the person who will initiate the verification has the Administrator role assigned to the Business Portfolio. Only administrators can start the verification process.
4. (Recommended) Verify your domain before requesting Business Verification
- Go to Settings → Brand Safety and Suitability → Domains, then add and verify your website domain using one of the available verification methods (meta tag, HTML file upload, or DNS TXT record). Verifying your domain helps reduce the likelihood of verification rejection and may enable additional verification options.
B — If you already have a Business Portfolio but the “Start Verification” button is not available
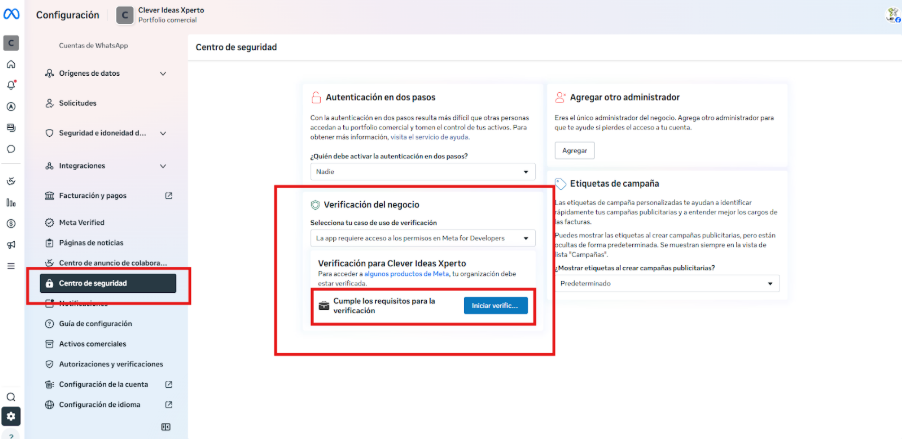
The verification button is available in the Security Center within Settings. If you do not see it, follow these steps:
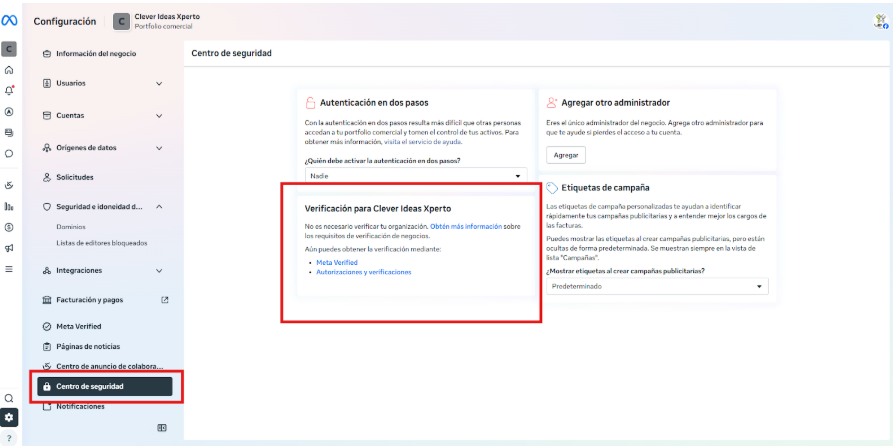
1. Create an empty app through Facebook for Developers (if you do not already have one)
⚠️ Important:
This step may be required when your Business Portfolio does not have any apps associated with it. Creating an app can help trigger the availability of the Business Verification option.
- Go to Accounts → Apps → Add → Create a new App ID.
If the third option, “Create a new App ID,” does not appear, you will need to create a new account and an app through Facebook for Developers.
- Go to Accounts → Apps → Add → Create a new App ID.

- A new tab will open with the Meta for Developers portal.
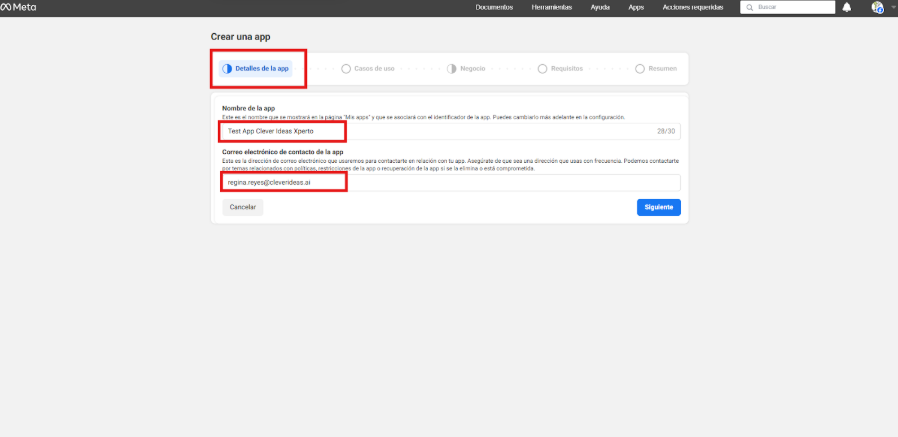
- Complete the information in the App Details window. Enter an identifiable app name (for example, “Demo Verification App” or another name that clearly indicates it is intended to enable verification). Make sure the email address matches the Facebook account email associated with the business administrator. Click Next.
- Under Use Cases, select the option “Authenticate and request data from users with Facebook Login” and click Next.

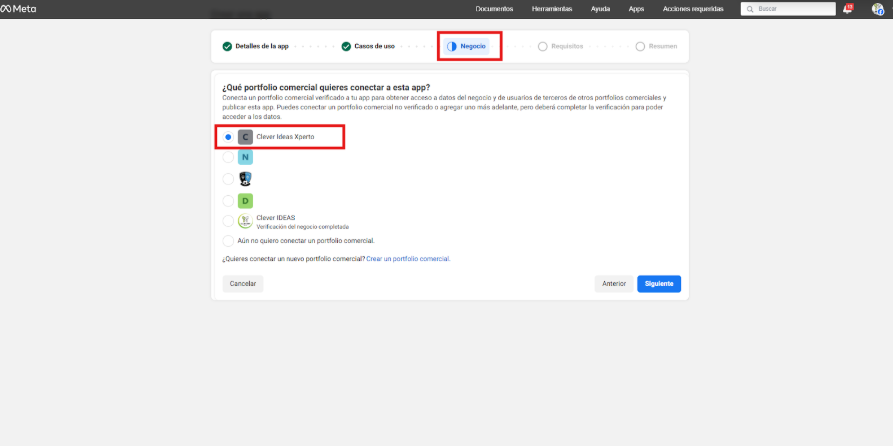
- Under Business, select your Business Portfolio and click Next. Under Requirements, click Next. In the Summary section, click Go to Dashboard.
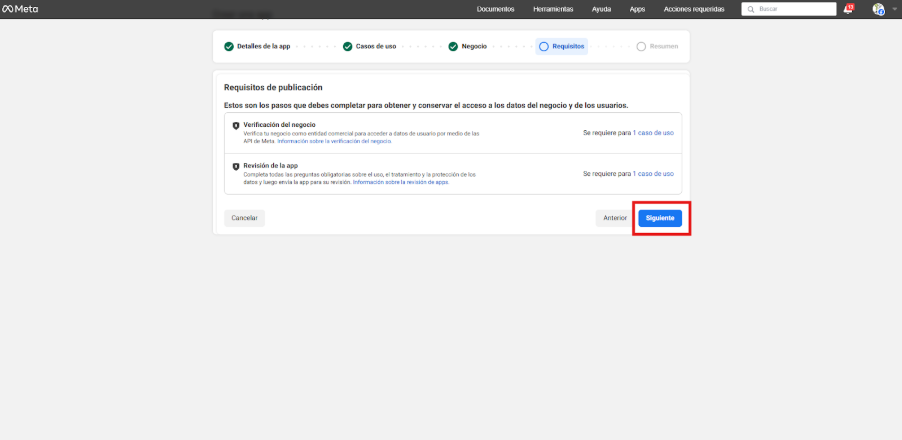
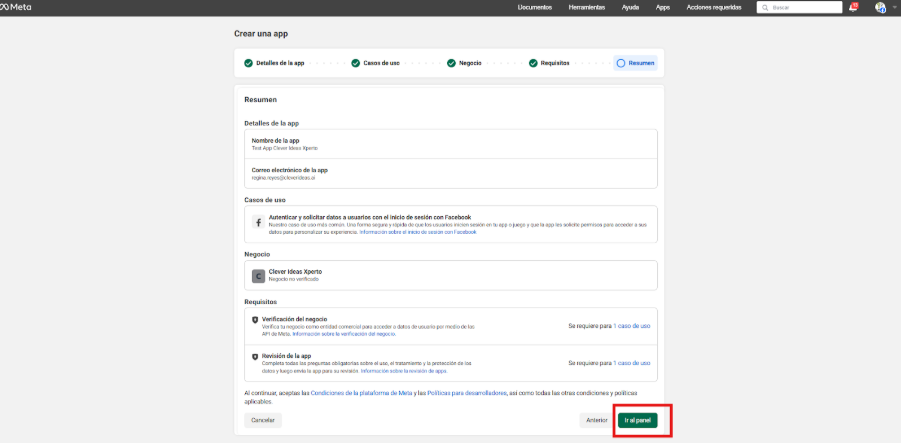
2. Refresh Meta Business Suite and check the Security Center.
- After creating the app, return to your Meta Business window and go to the Security Center from the Settings side menu. Refresh the page to apply the changes.
- Check if the “Start Verification” button is now available. If everything was completed correctly, the button should be enabled.
1.-Select verification method
Select the verification method (SMS/call, email, or domain). Choose the email option (recommended). Make sure the email address belongs to your website domain and is available to receive the one-time password (OTP) code. Click Next.

4. Upload legal documents
Upload official documents that prove the legal existence of the business (commonly accepted examples include: certificate of incorporation, tax registration documents, company bank statement, or business license). Make sure that:
- Documents are in color and clearly readable.
- The legal business name and address exactly match the information provided in Business Information.
- Files are not cropped, blurry, or incomplete.
5. Submit the request and wait for a response
Submit the verification request. Meta typically provides an estimated processing time ranging from a few minutes to several business days (in practice, it may take up to 14 days depending on the case and region). Check the verification status in the Security Center.
6. If verification is approved
You will receive a notification by email, and the status will be updated in the Security Center. Additional capabilities will be enabled depending on the product (for example, API access, increased trust for sensitive advertising features, and more).

7. If verification is rejected
Meta will provide the rejection reasons in the Security Center. Address the identified issues (such as missing or invalid documents, data inconsistencies, or an unverified domain) and resubmit the request with the corrected documentation and supporting evidence.
Official Resources and Recommended Reading
Meta Help — Verify your business in Meta Business Suite.